Netlify
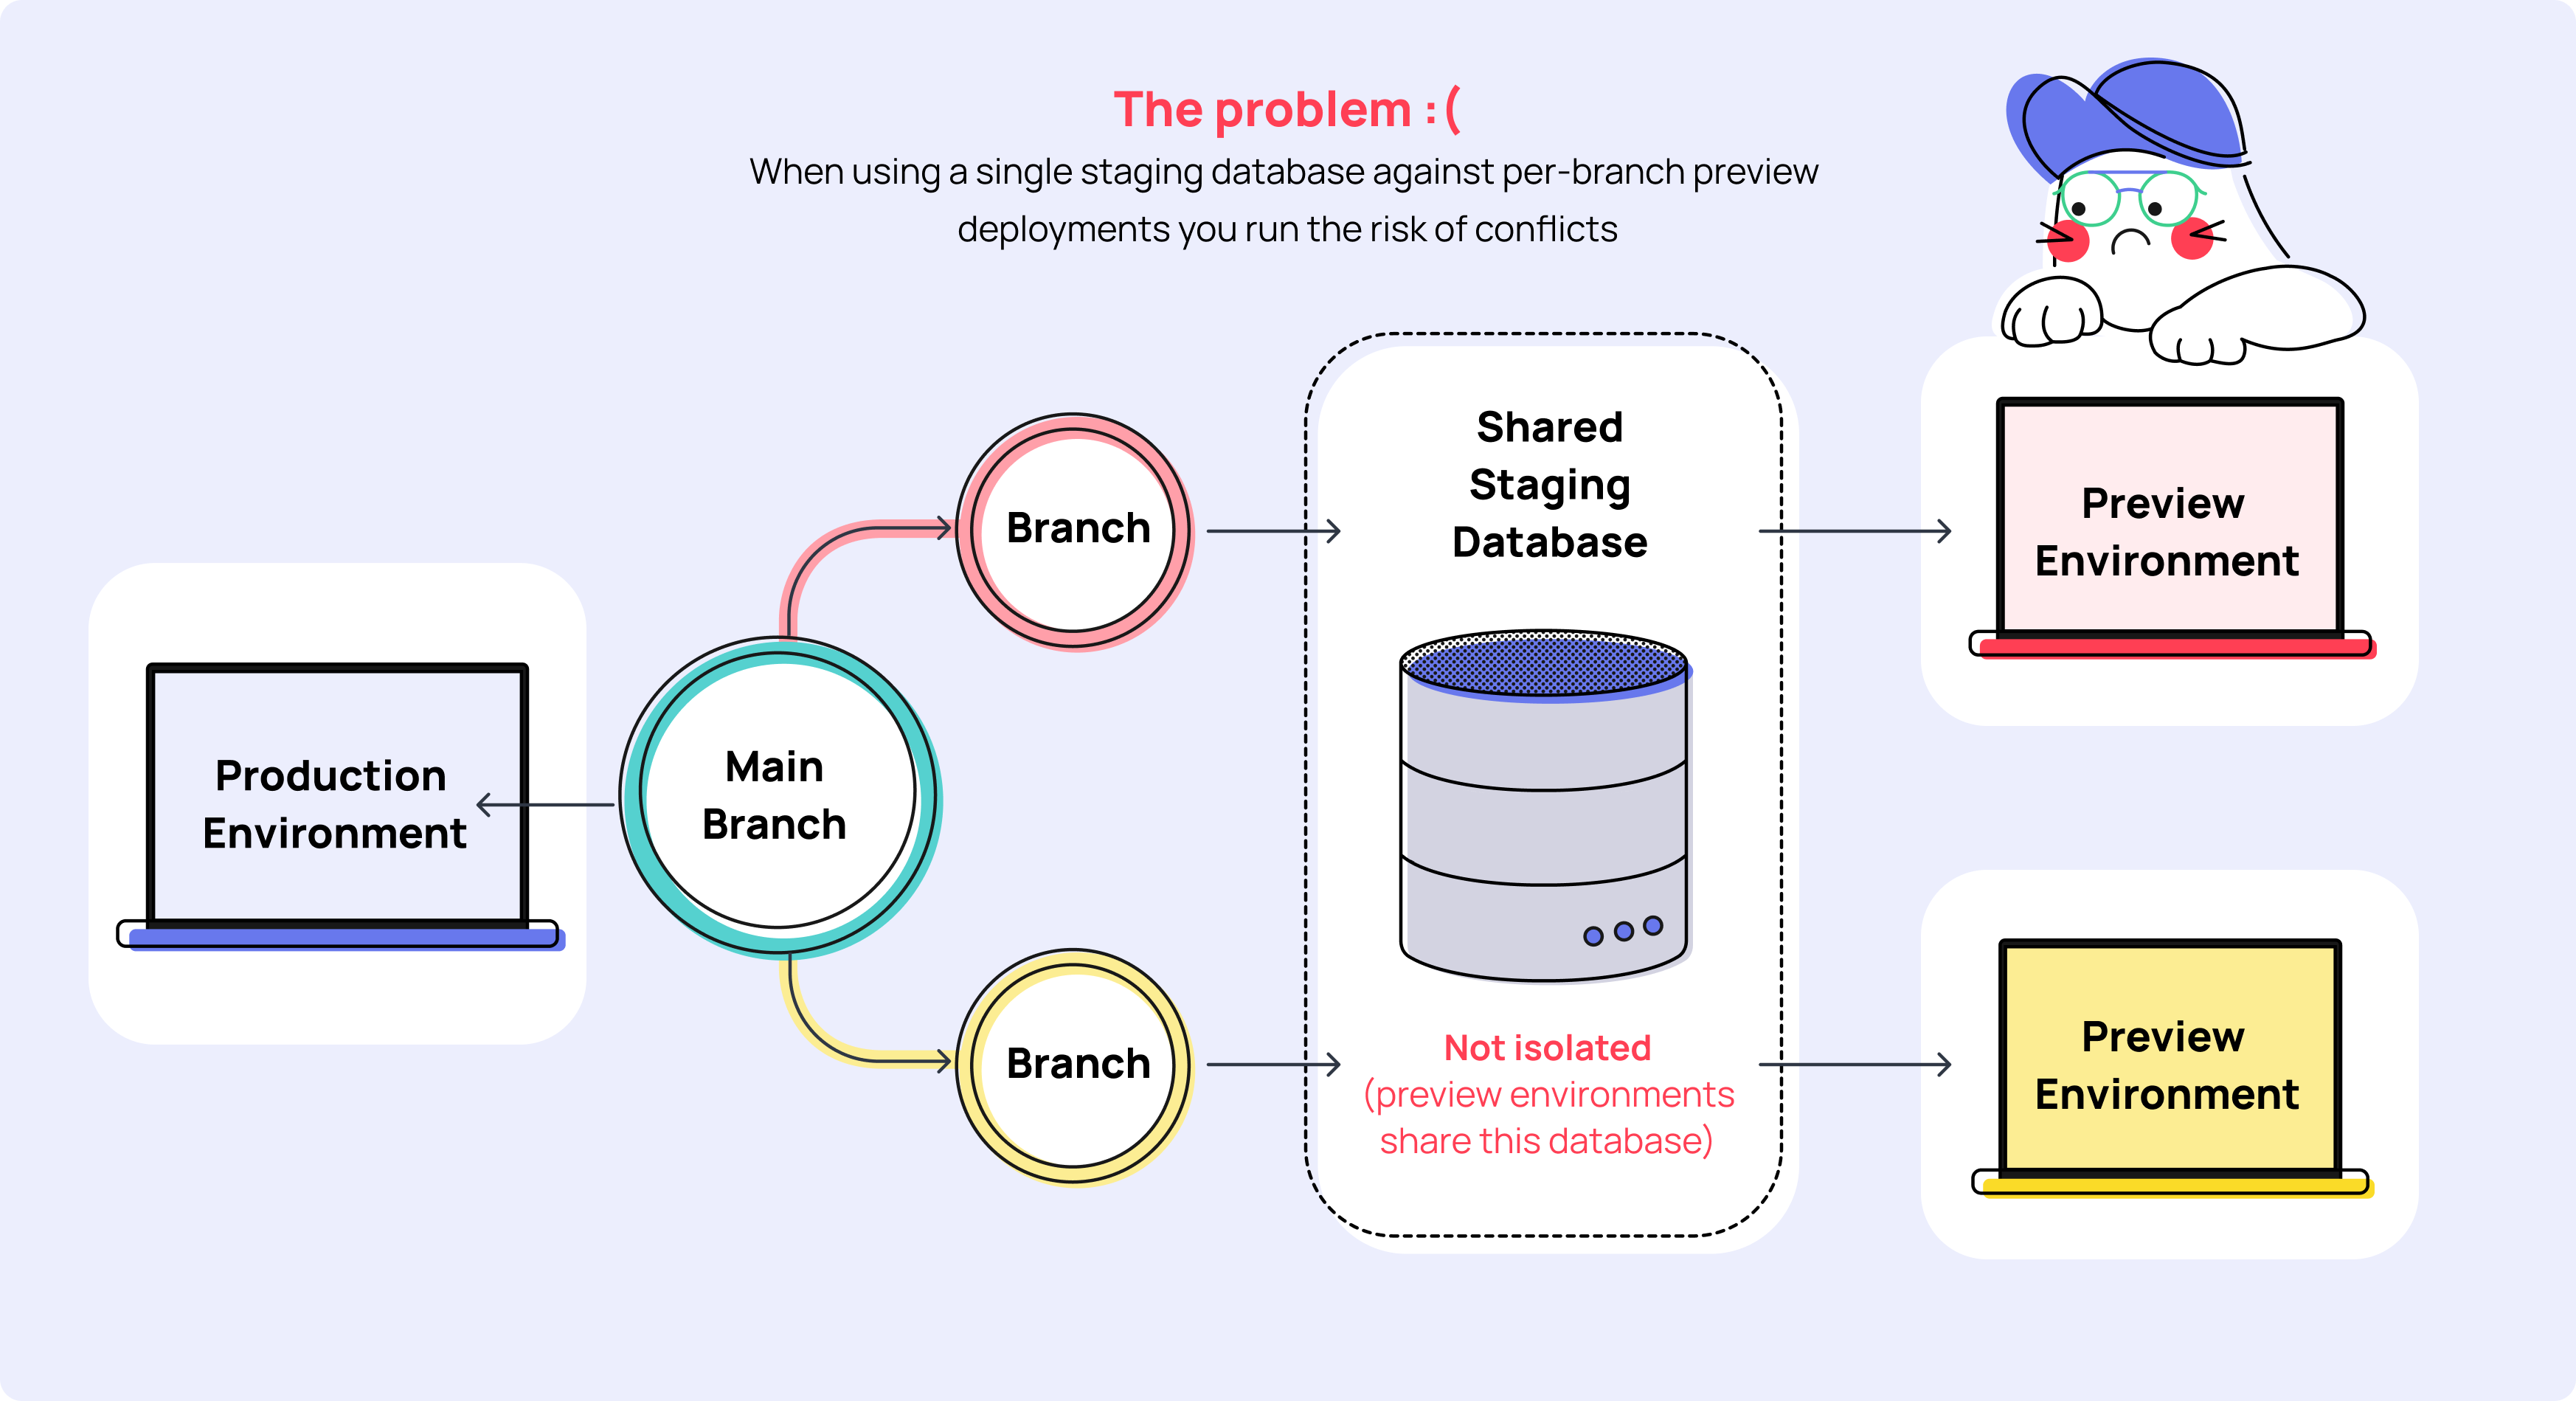
Netlify's (opens in a new tab) Preview Deployments are a great way to preview changes and verify that your code is working as intended in a live environment. Unfortunately, one limitation is that all your preview environments typically run against a single shared database; generally a staging environment. As this is a shared environment and not isolated, changes to the structure or data of this database may create conflicts for other preview environments using the same database.
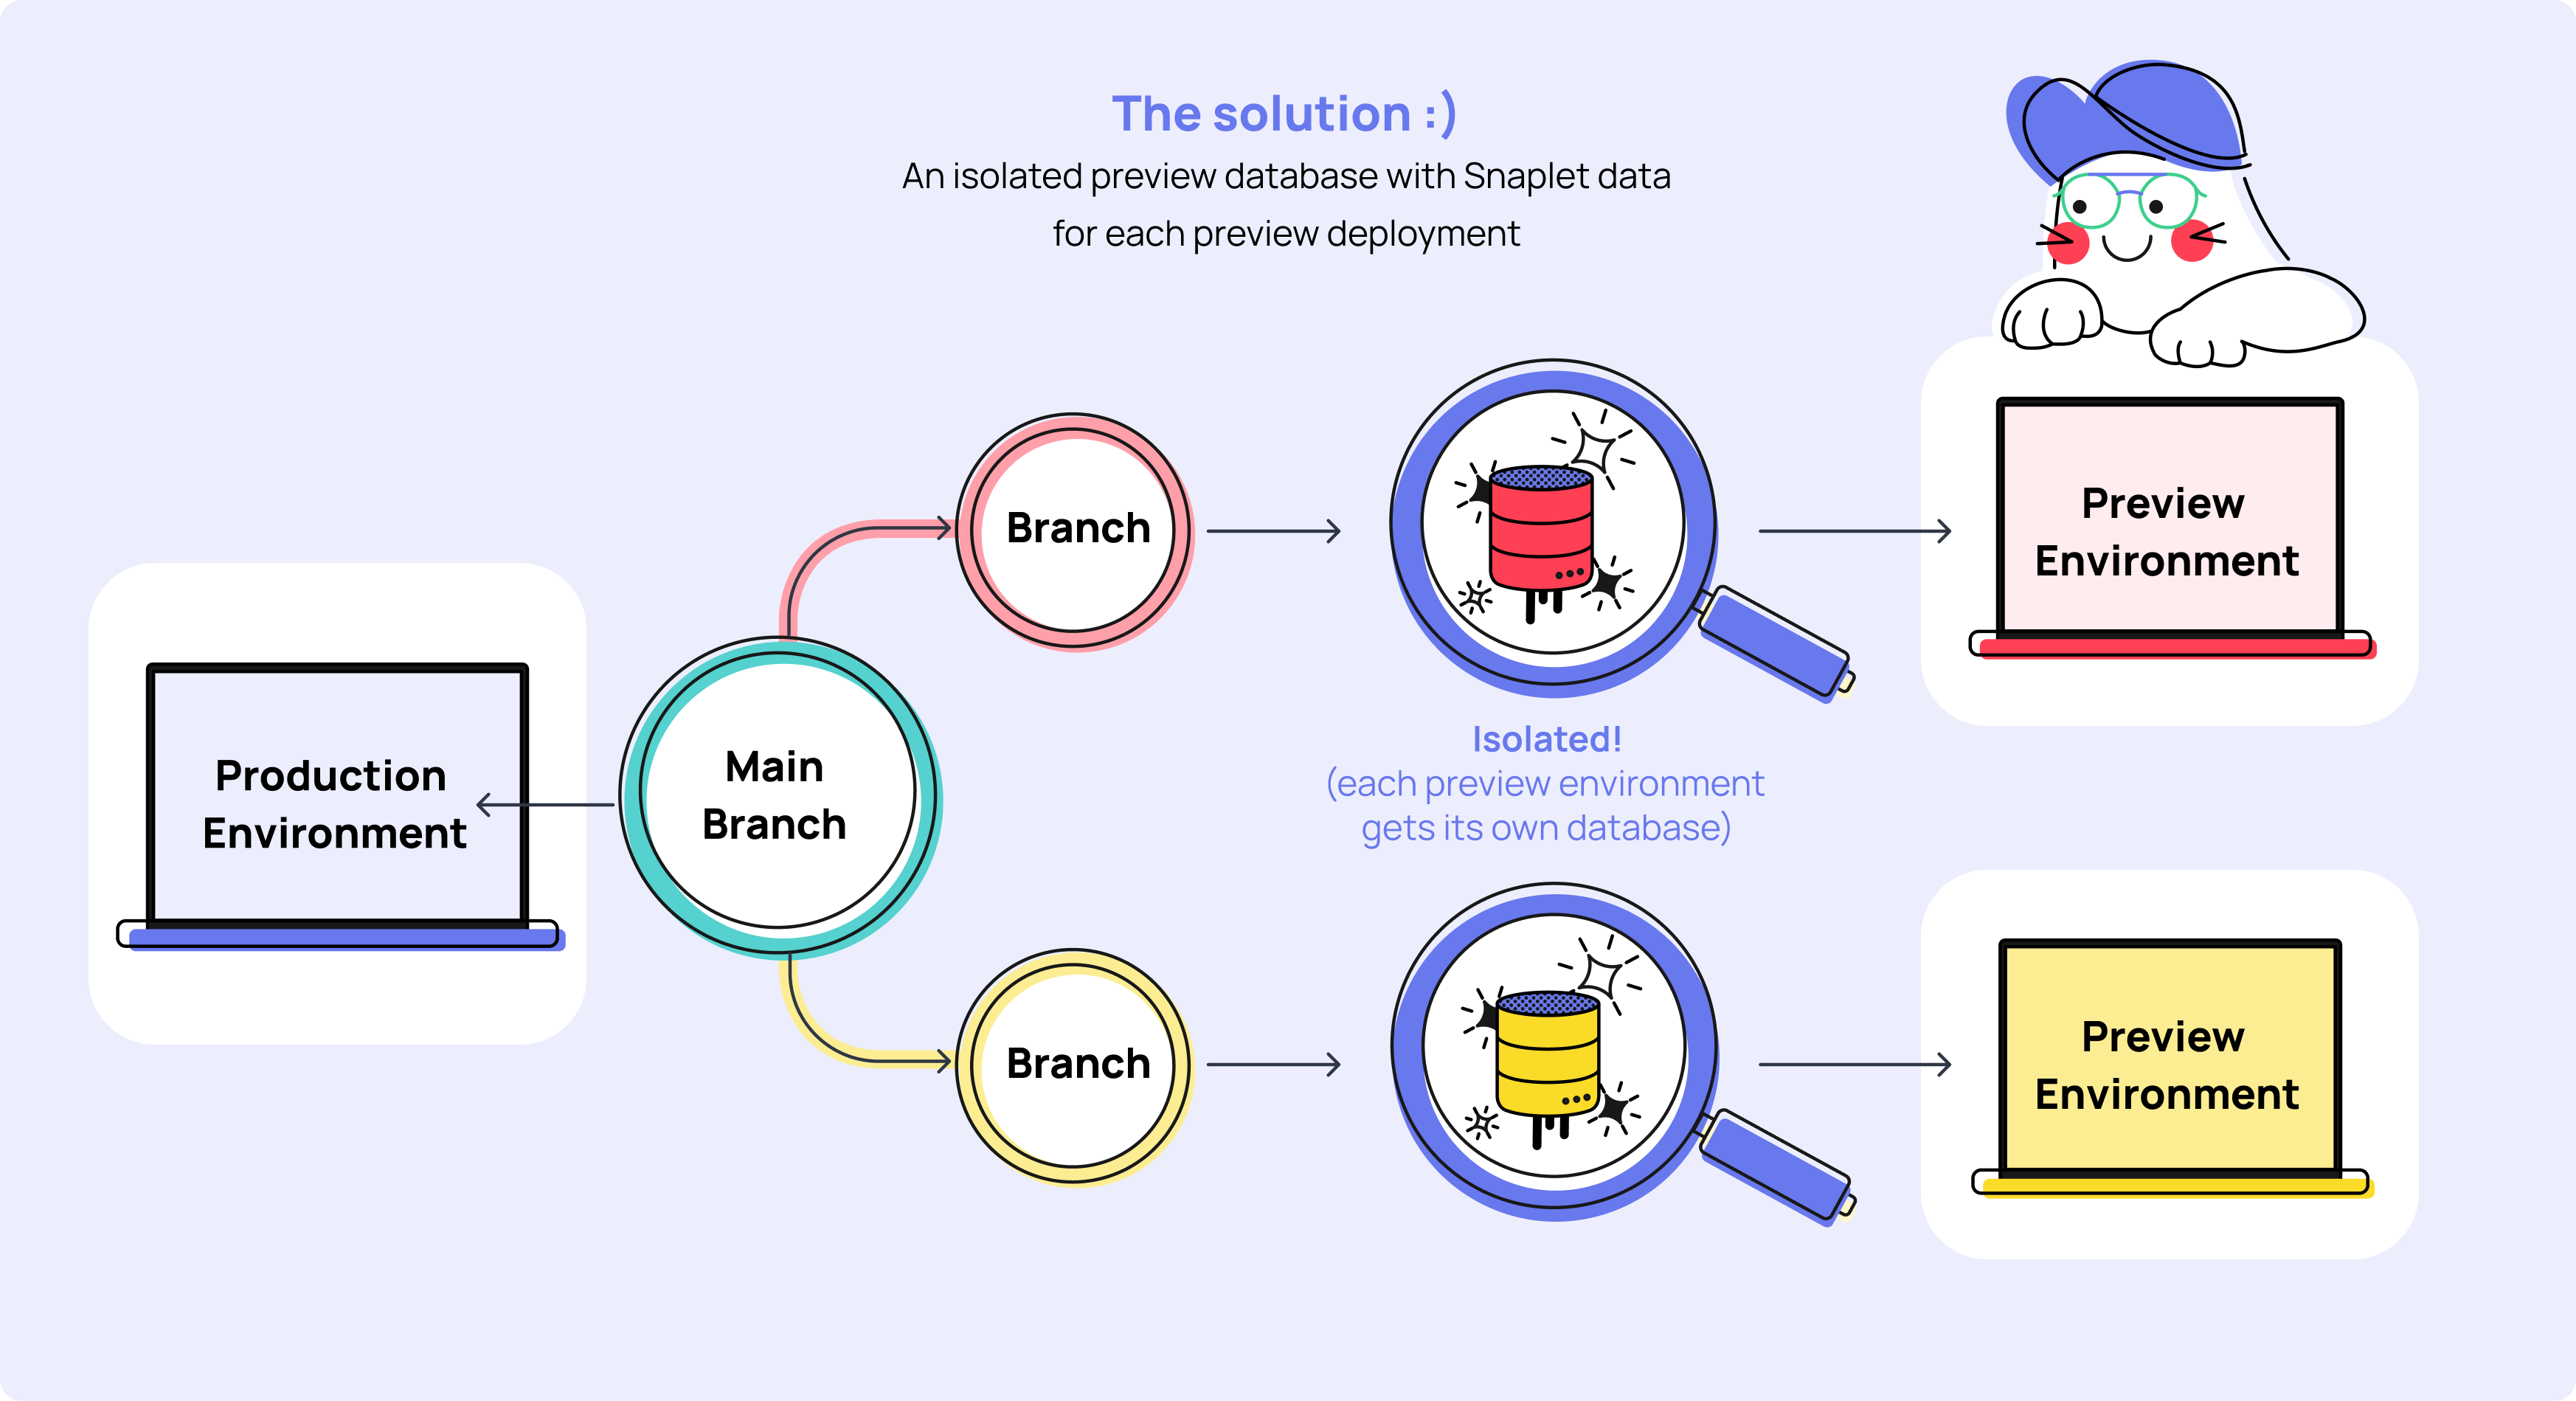
The solution is to create an isolated database for each preview environment, which is now possible with the Snaplet Netlify Preview Plugin (opens in a new tab). Once you have a preview database for each Netlify Preview Environment you no longer have worry about conflicting migrations and unexpected mutations to data, since each preview database is isolated and scoped to a deployment. As a bonus, your isolated preview environments will be using safely anonymized production-realistic data, ensuring parity between your development and production environments.
In this guide we'll show you how to setup and configure the Netlify Preview Plugin from Snaplet. Let's go!
Getting started
For this guide, we're assuming that you have a production database associated with your Netlify site. We're going to capture a snapshot of that production database, remove any personally identifiable information to make it safe to use, and then restore that data into a unique isolated preview database for each individual Netlify preview deployment. Throw away your shared staging database, it's time to bootstrap your preview environments with isolated, production-realistic databases and data!
![]()
Step 1: Prerequisites
1.1. A Netlify account: You'll need to have an existing site on Netlify, connected to your git client. Check the Netlify Get Started guide (opens in a new tab) if you are new to Netlify or need help setting this up.
1.2. A Snaplet account: You'll need a Snaplet account - go to Snaplet (opens in a new tab) and Sign up for a new account (it's free and quick).
Once you're signed up to Snaplet, you'll need to capture a snapshot of your Netlify site's production database, so Snaplet can restore that snapshot into your preview database for your preview deployments on Netlify.
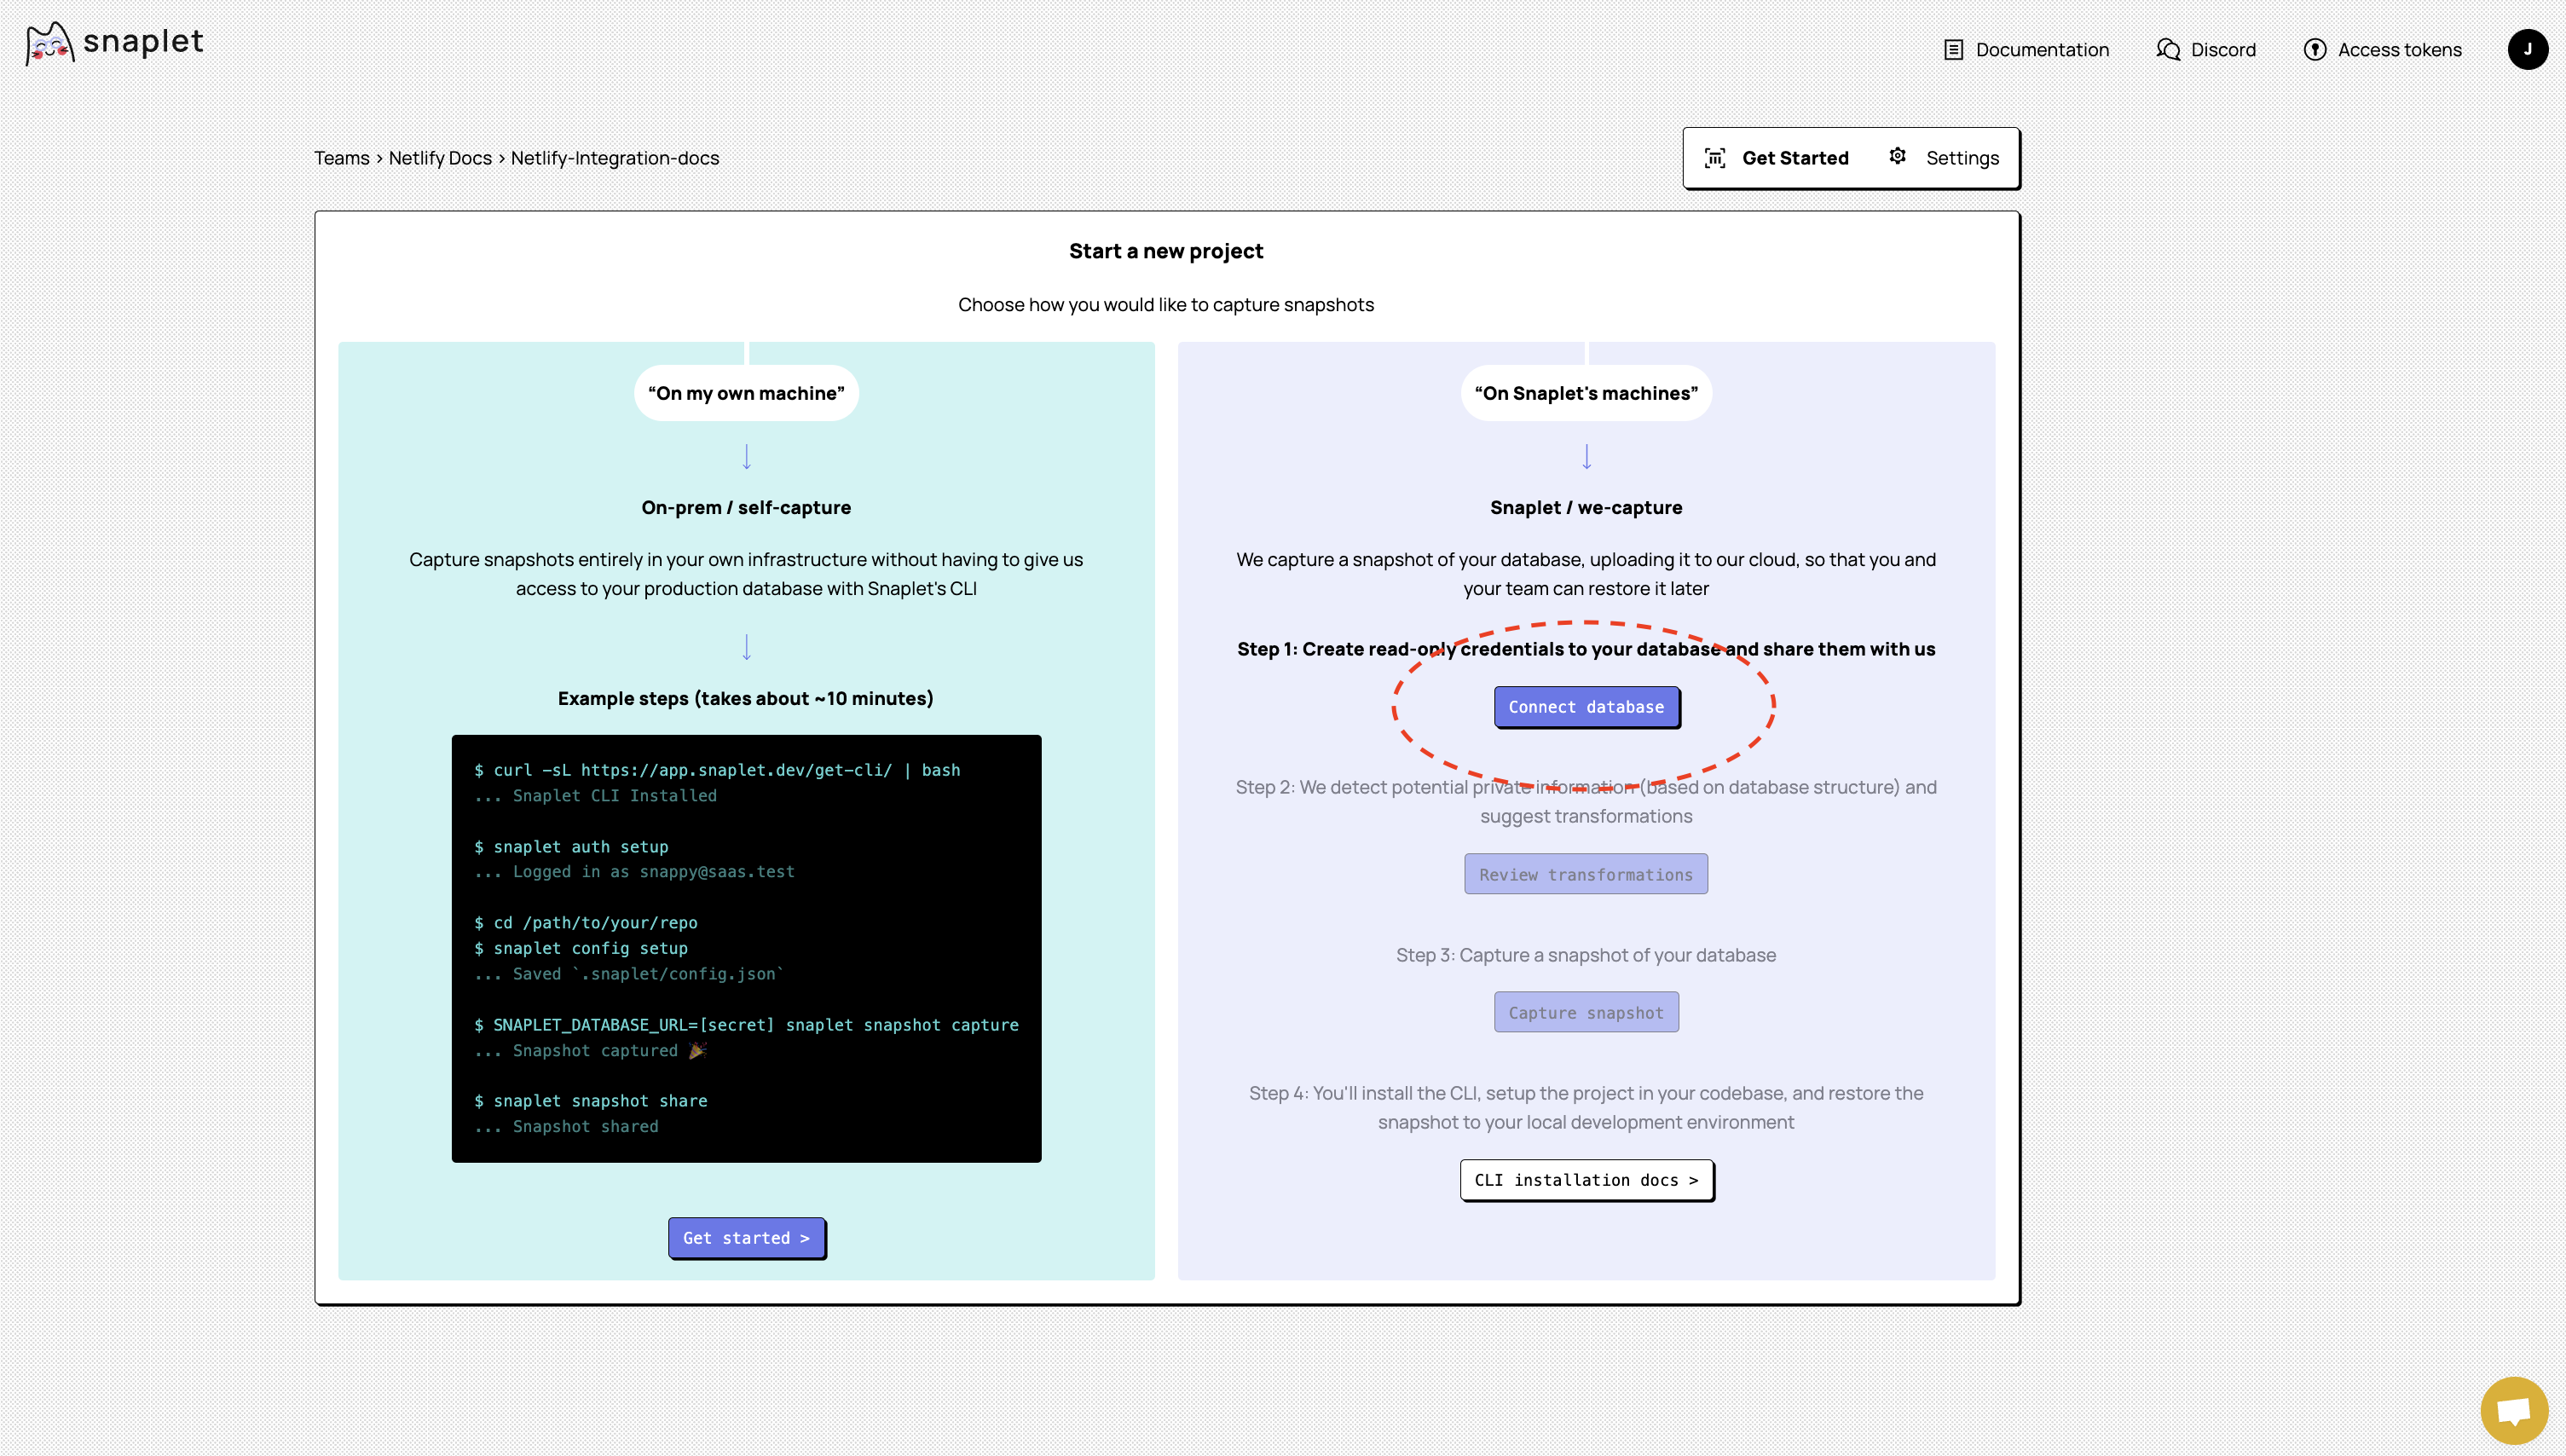
1.3. A Snaplet snapshot of your production database The fastest way to capture a snapshot of your database is via the Snaplet web app. On the Start a new project page after setting up your Snaplet account, follow the Snaplet Cloud Capture journey which has Snaplet capture and host snapshots for you. Start by clicking Connect Database and providing your production database connection string.
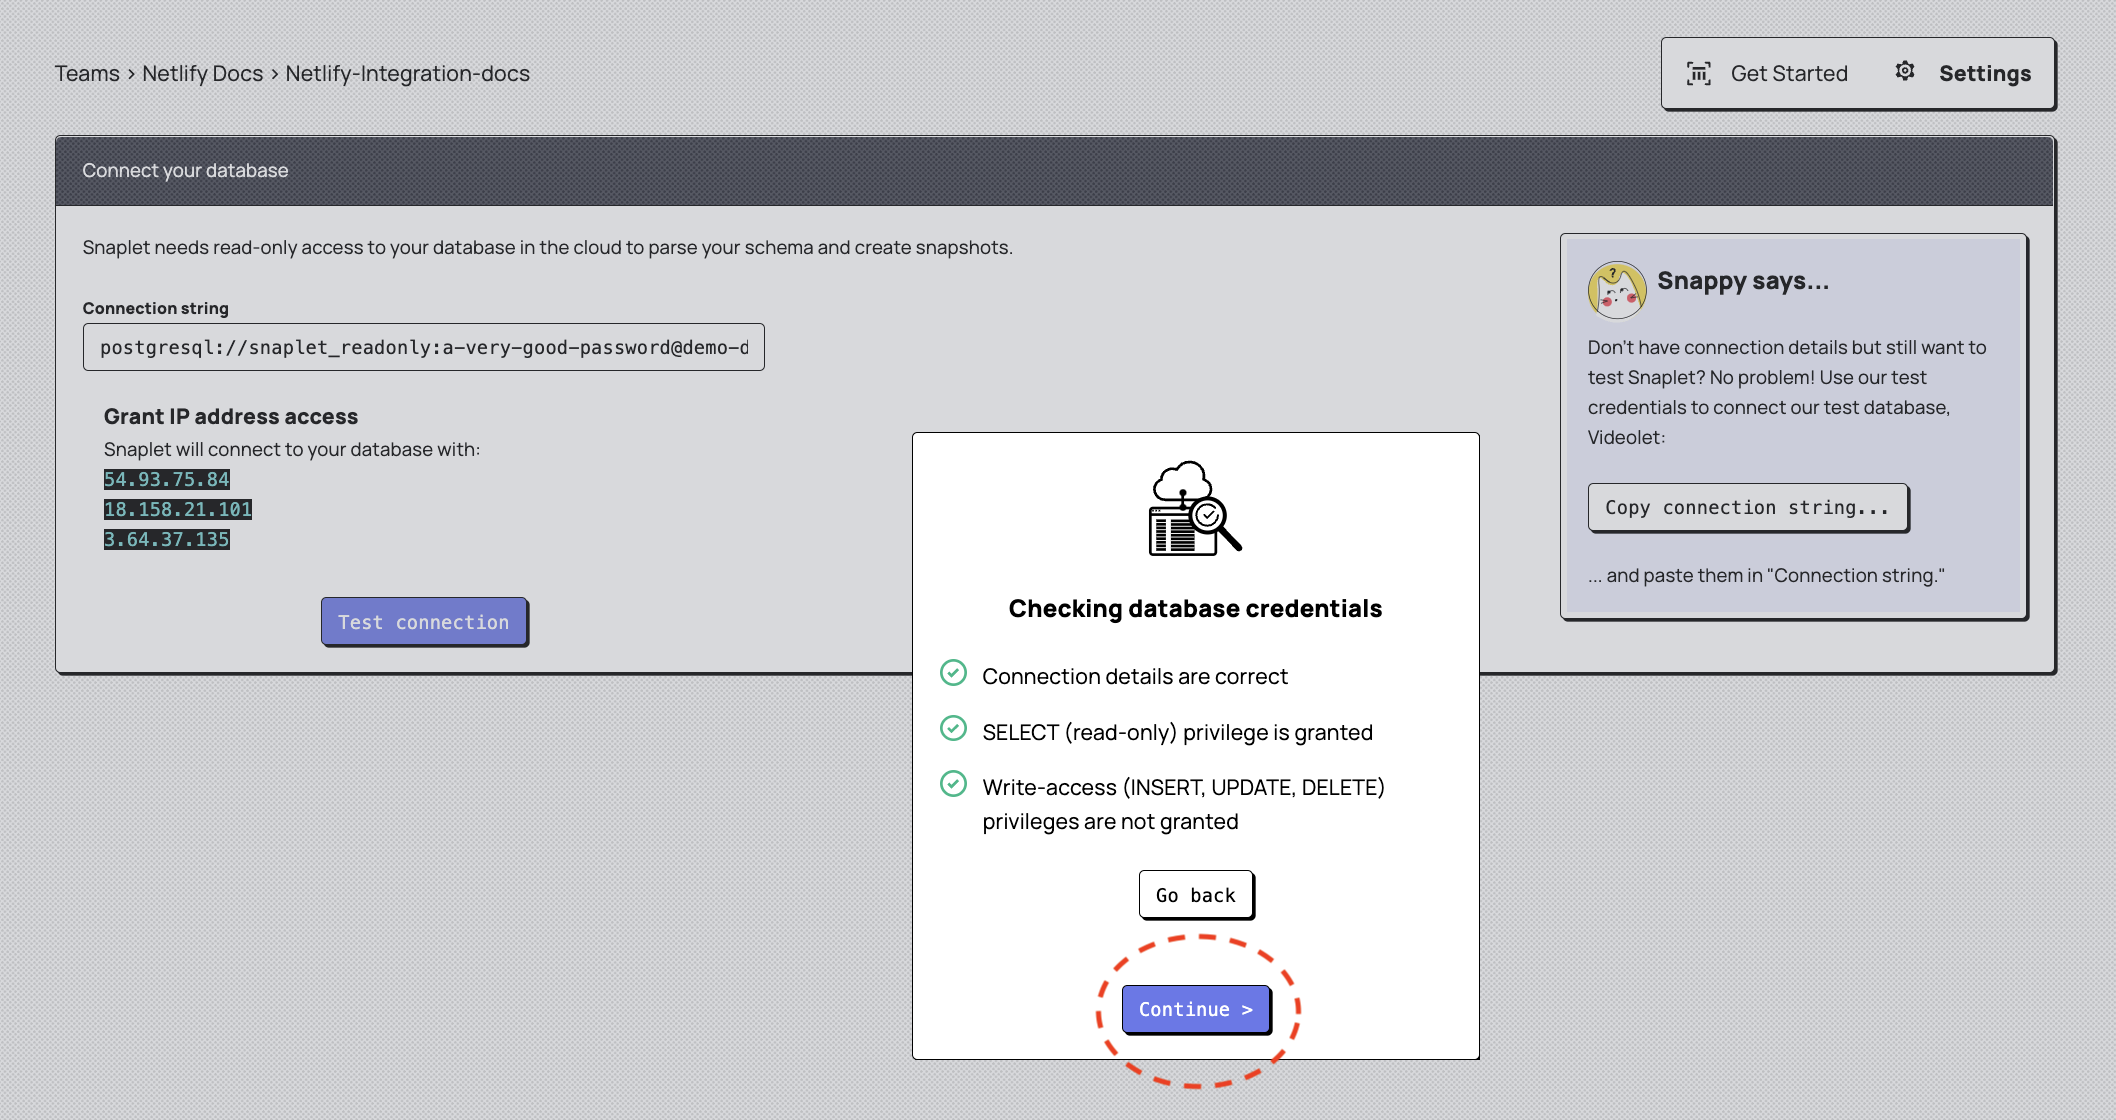
Enter your Netlify production database connection string and Test connection to verify Snaplet can connect to your database with read-only credentials. Click Continue once your database credentials have been successfully checked.
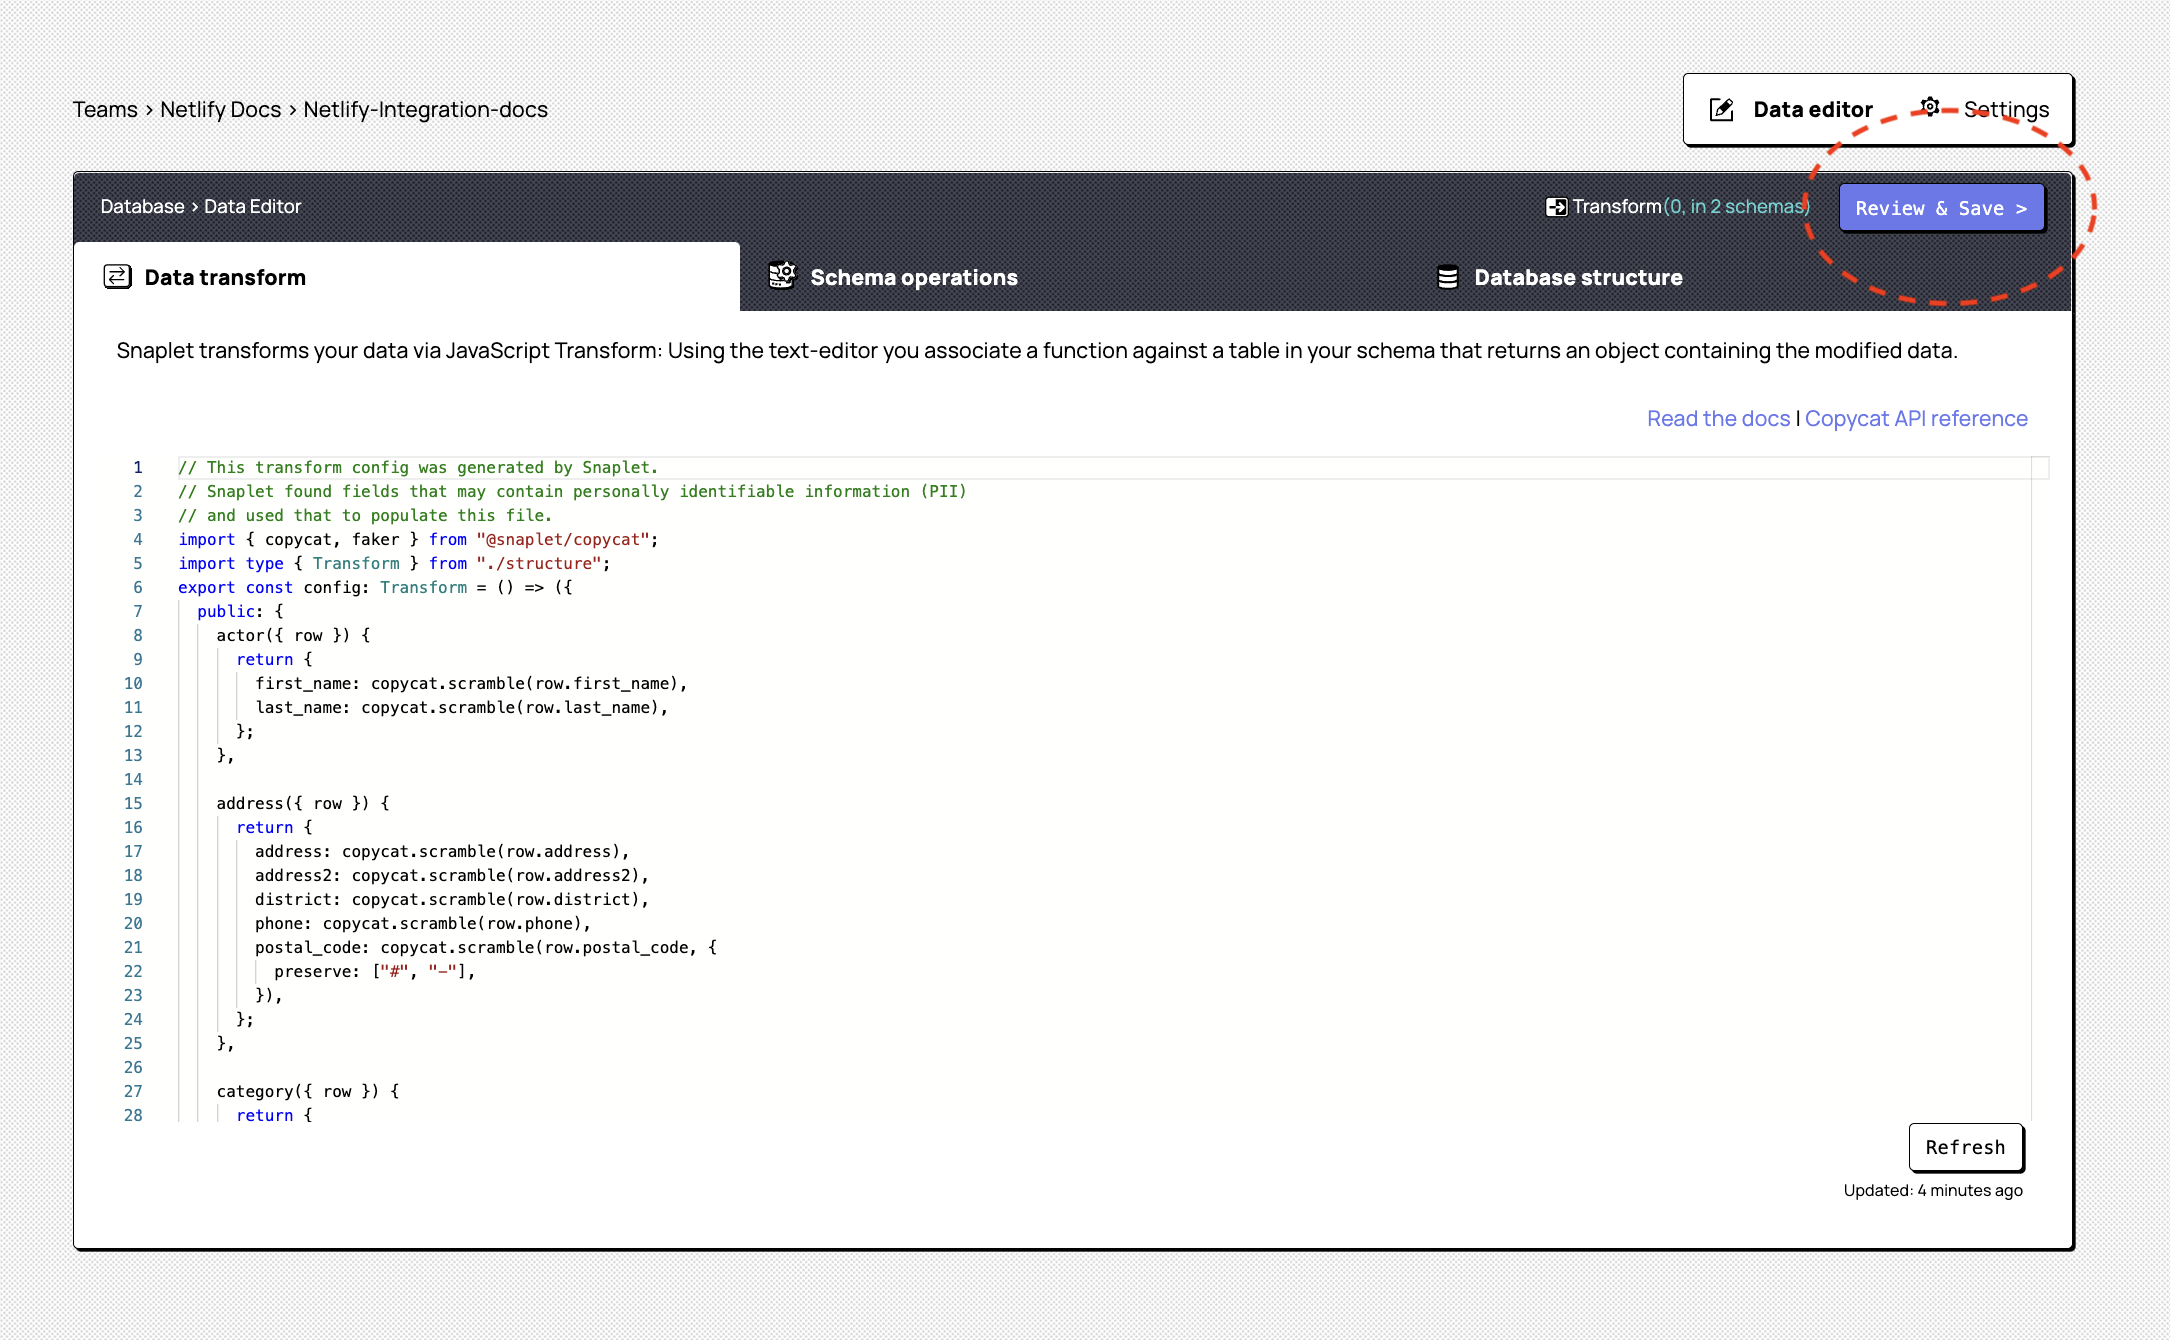
You'll now have an opportunity to review the personally-identifiable information that Snaplet has detected in your database. Sensitive information such as names, email addresses, physical addresses and such should be automatically detected and transformed, but you can review the transformations, and transform additional data should you wish to. You can also exclude specific schemas from the snapshot, and view a visual representation of the tables in your database. Once you're satisfied with the settings, click Review and Save, which will prompt Snaplet to automatically capture your first Snapshot.
At this point, Snaplet's workers will be connecting to your database and creating a snapshot. This can take a minute or two. If you get stuck with any of these steps or encounter issues, check the Snaplet docs (opens in a new tab) or get help via the Snaplet Discord (opens in a new tab). We'll be happy to guide you.
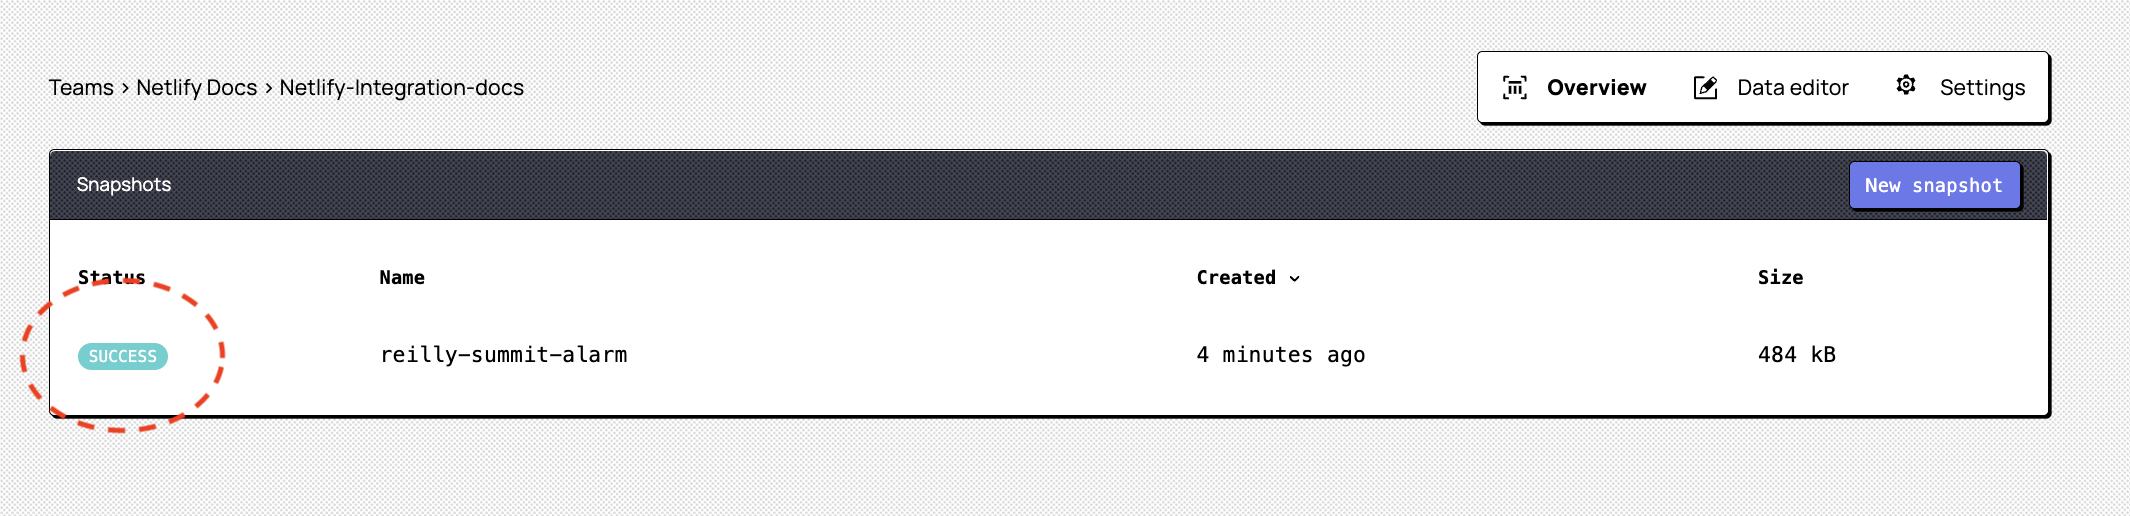
You're done with this step when you can see a successfully created snapshot in your Snapshots panel, and can move on to the plugin installation and configuration.
Step 2: Install the Snaplet Netlify Preview Plugin
2.1. Add the build plugin to your Netlify project. Go to the Snaplet Integration Page (opens in a new tab) on the Netlify Integration hub and click Add build plugin to install the Preview Databases plugin to the correct Netlify site.
Now we just need to configure the plugin to work correctly. This requires adding some environment variables to your Netlify site.
Step 3: Add environment variables
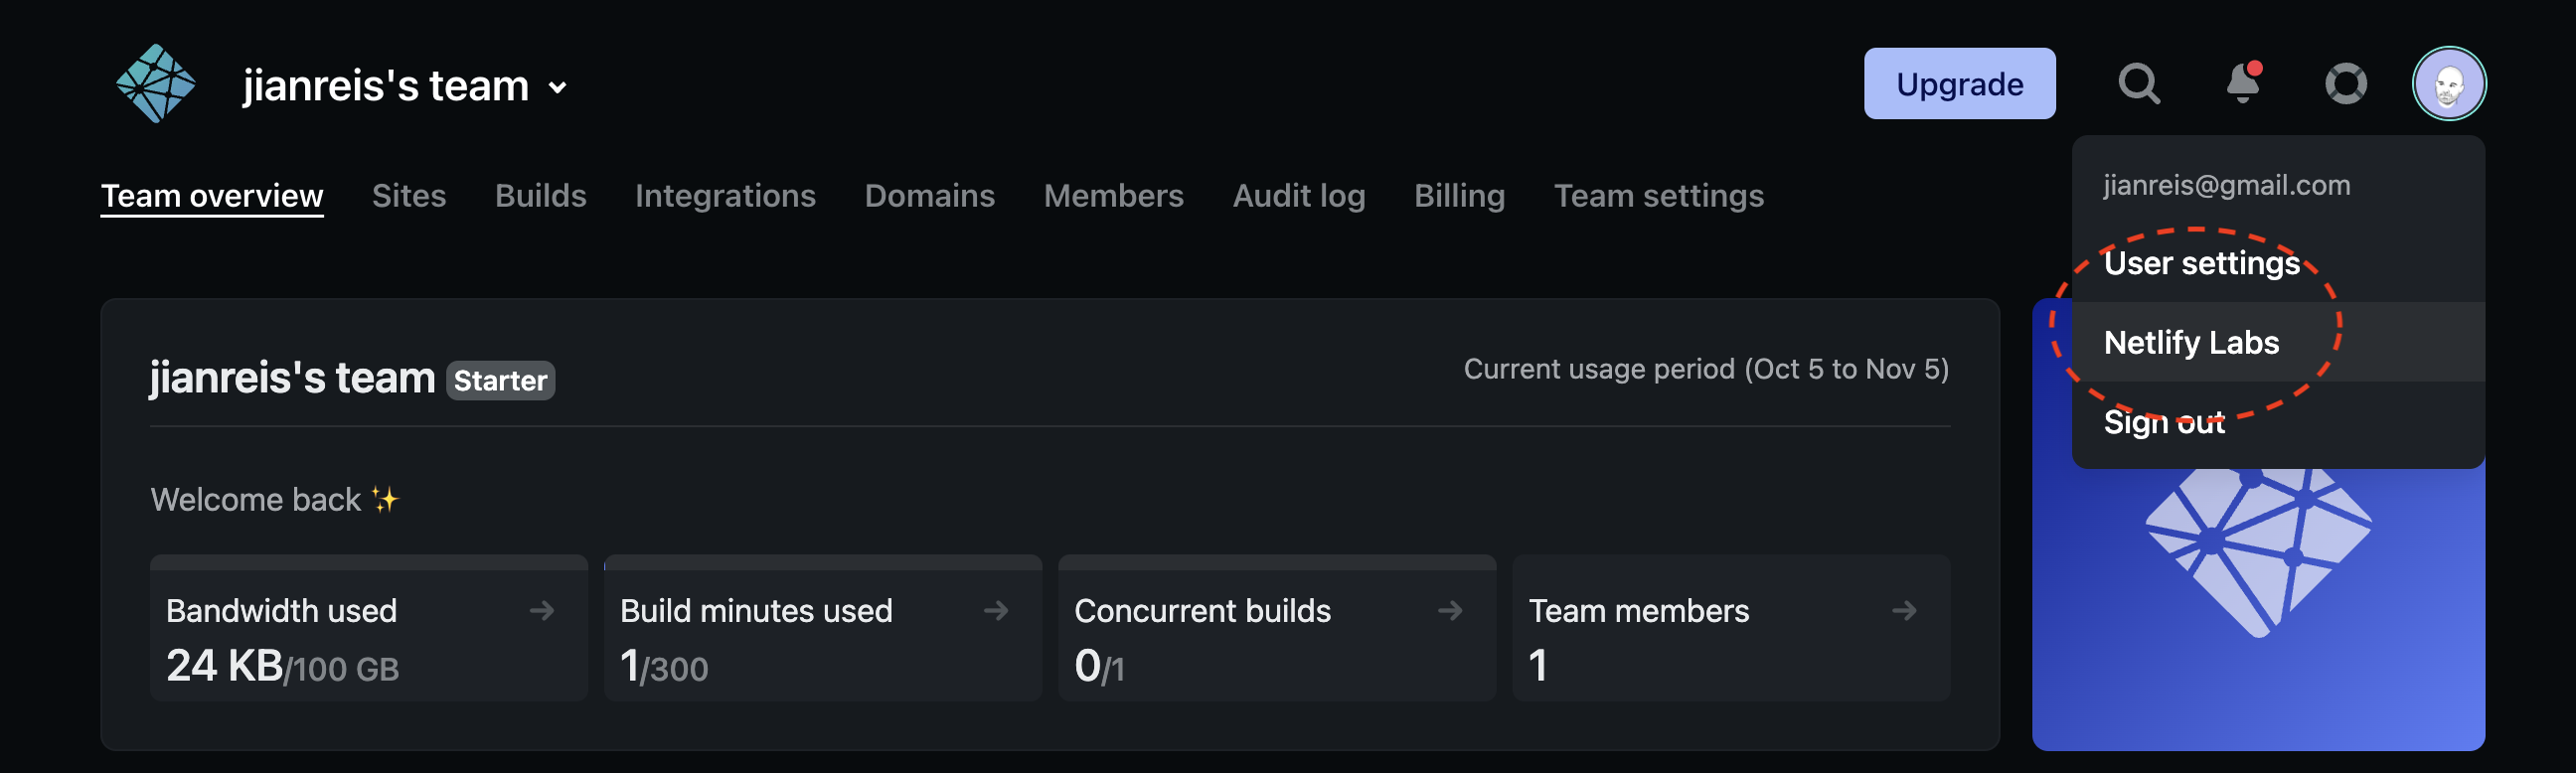
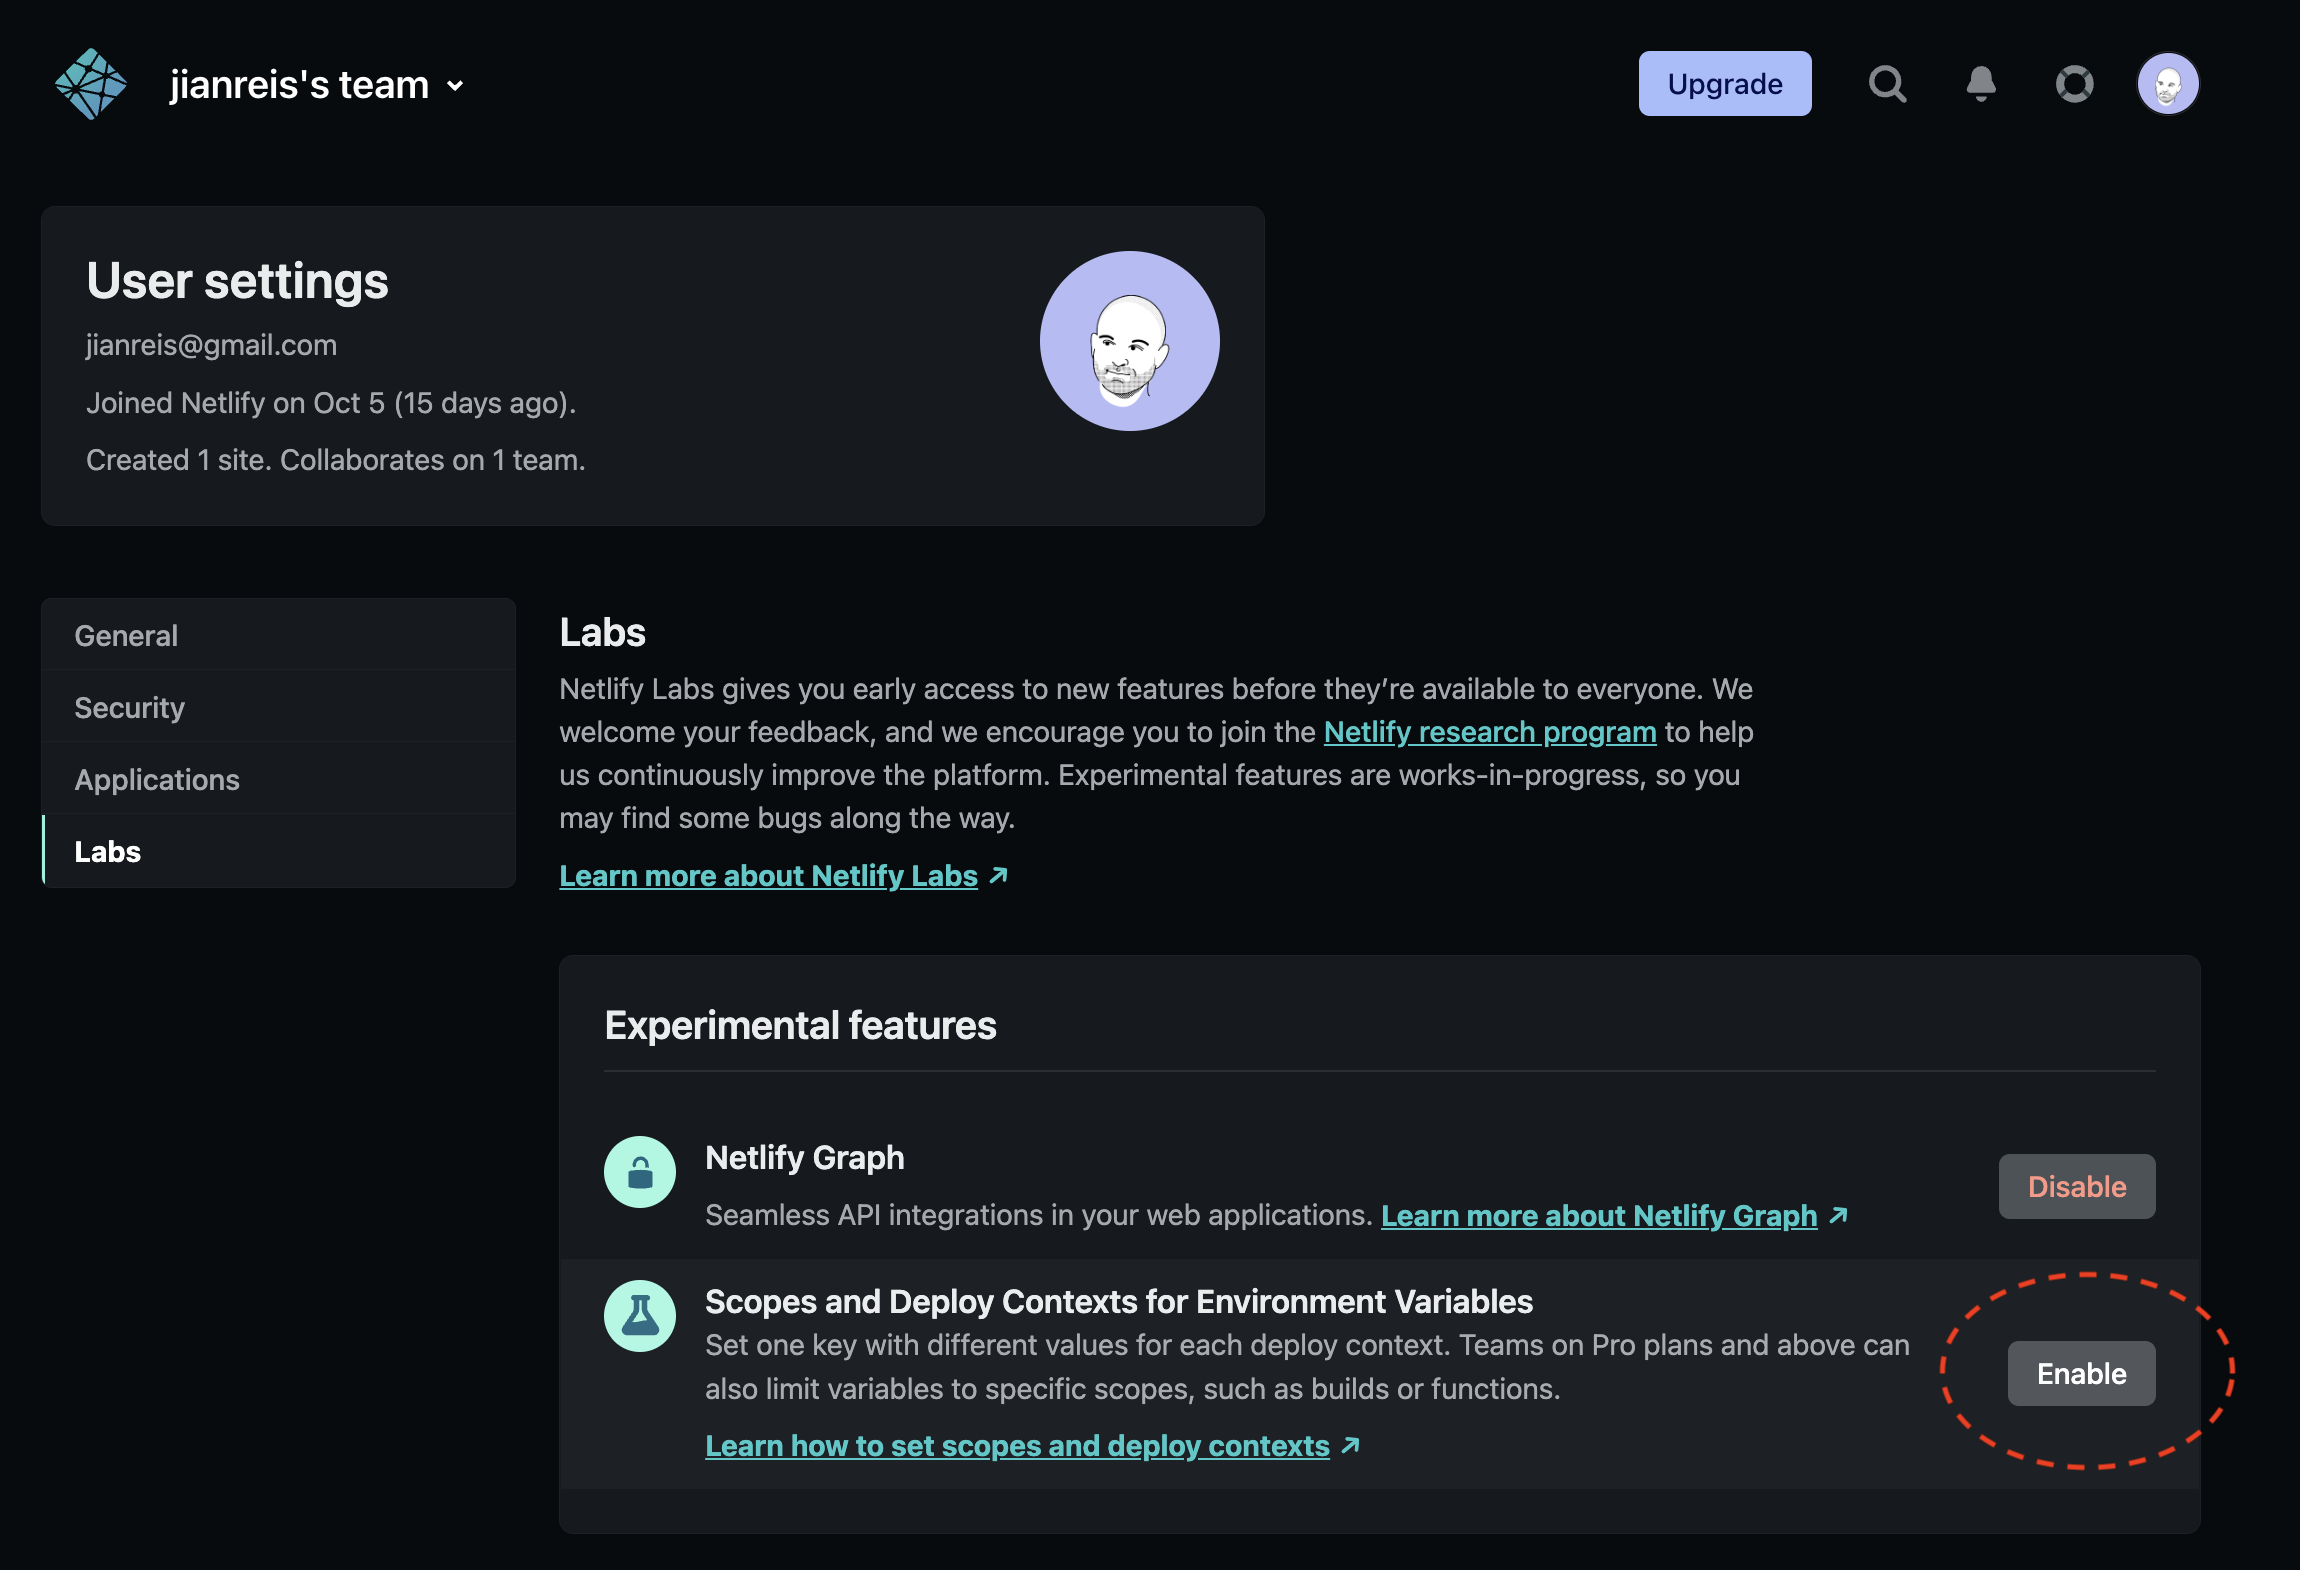
3.1. Enable deploy contexts for environment variables. To get started, we need to enable deploy contexts for environment variables. This is currently a beta feature on Netlify. To enable it, Navigate to Netlify Labs > Scopes and Deploy Contexts for Environment Variables and click Enable.
3.2. Opt in to environment variables: You'll now be able to opt in for using environment variables for your project. To do so, navigate to Site Settings and look for the Environment Variables (beta) option. Click Opt into the new experience or Migrate environment variables if you happen to have existing environment variables.
Alright. Let's add some new environment variables to your Netlify project.
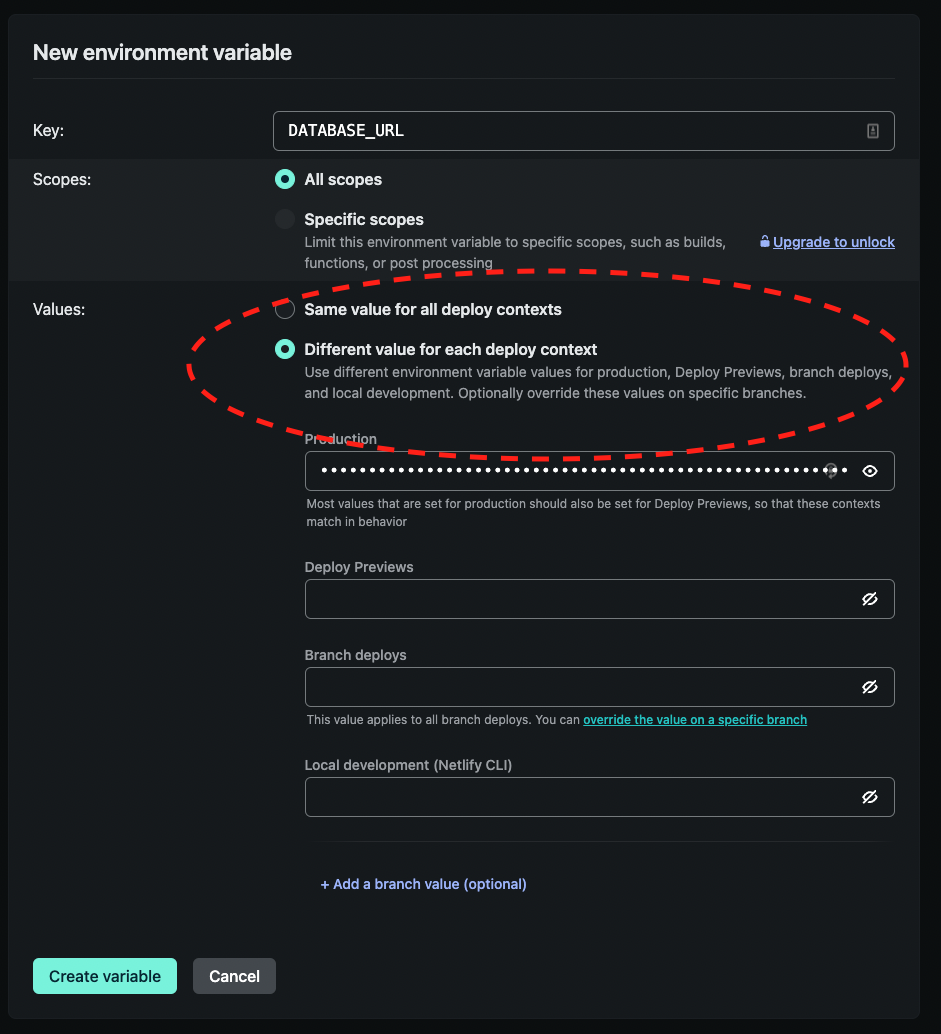
3.3. Add the database URL environment variable (DATABASE_URL):
Start with the database URL environment variable, if this doesn't exist already. This is the URL of your actual Netlify site's production database. Click Add a variable to add your database URL environment variable. We recommended that you use the Different values for each deploy context setting, and specify the DATABASE_URL for your production environment, to prevent any chance of your production data leaking into other environments.
3.4. Add a Snaplet access token (SNAPLET_ACCESS_TOKEN):
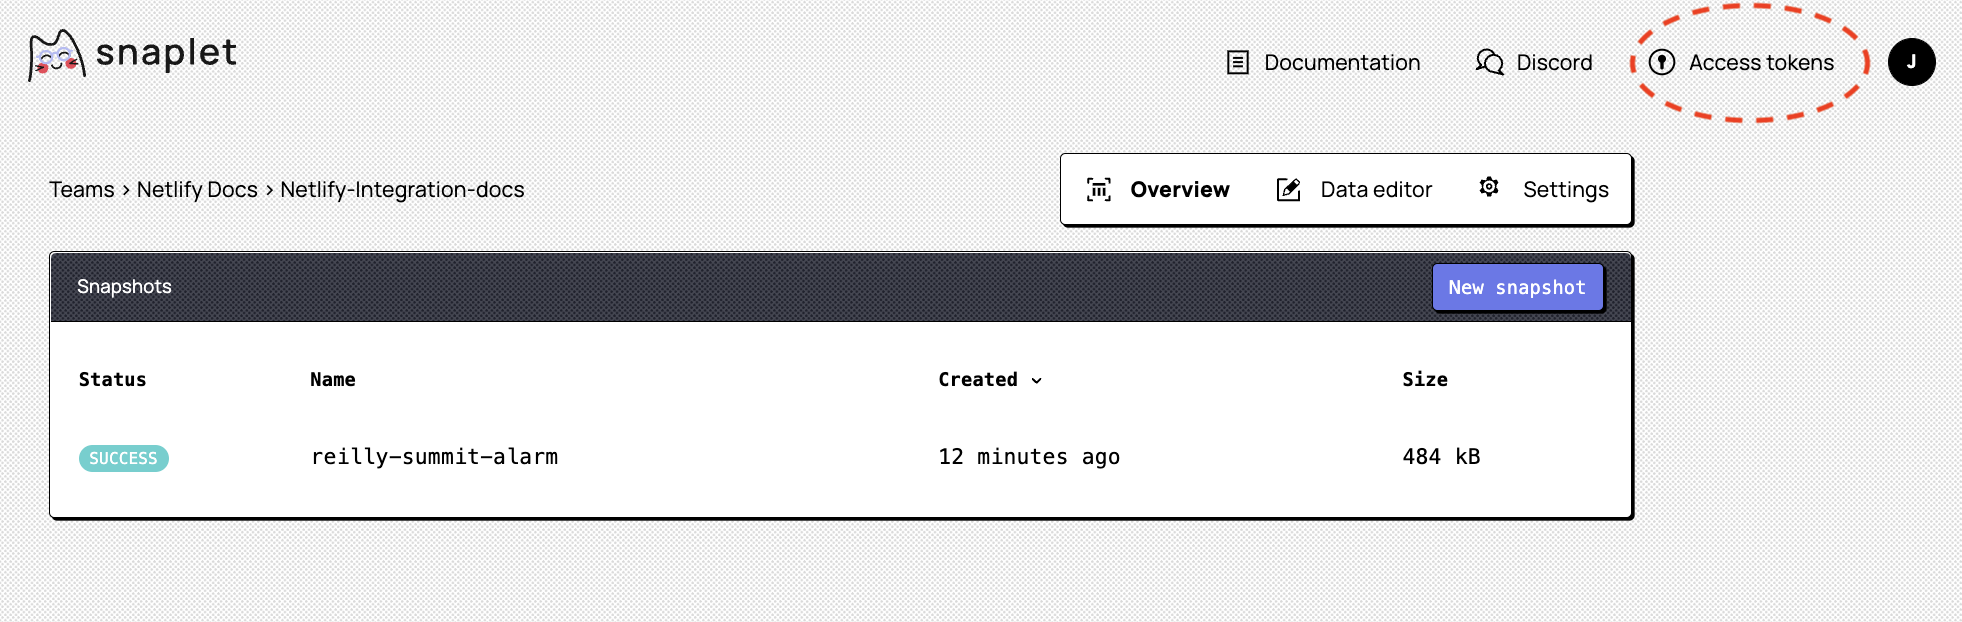
You'll now need to add a Snaplet access token environment variable. Start by generating a new access token from within the Snaplet UI - look for Access tokens in the top right of your browser. Generate a new access token, give it a name, copy the value, and add it to your Netlify project as a new environment variable SNAPLET_ACCESS_TOKEN. For this and the remaining environment variables, use the Same value for all deploy contexts setting.
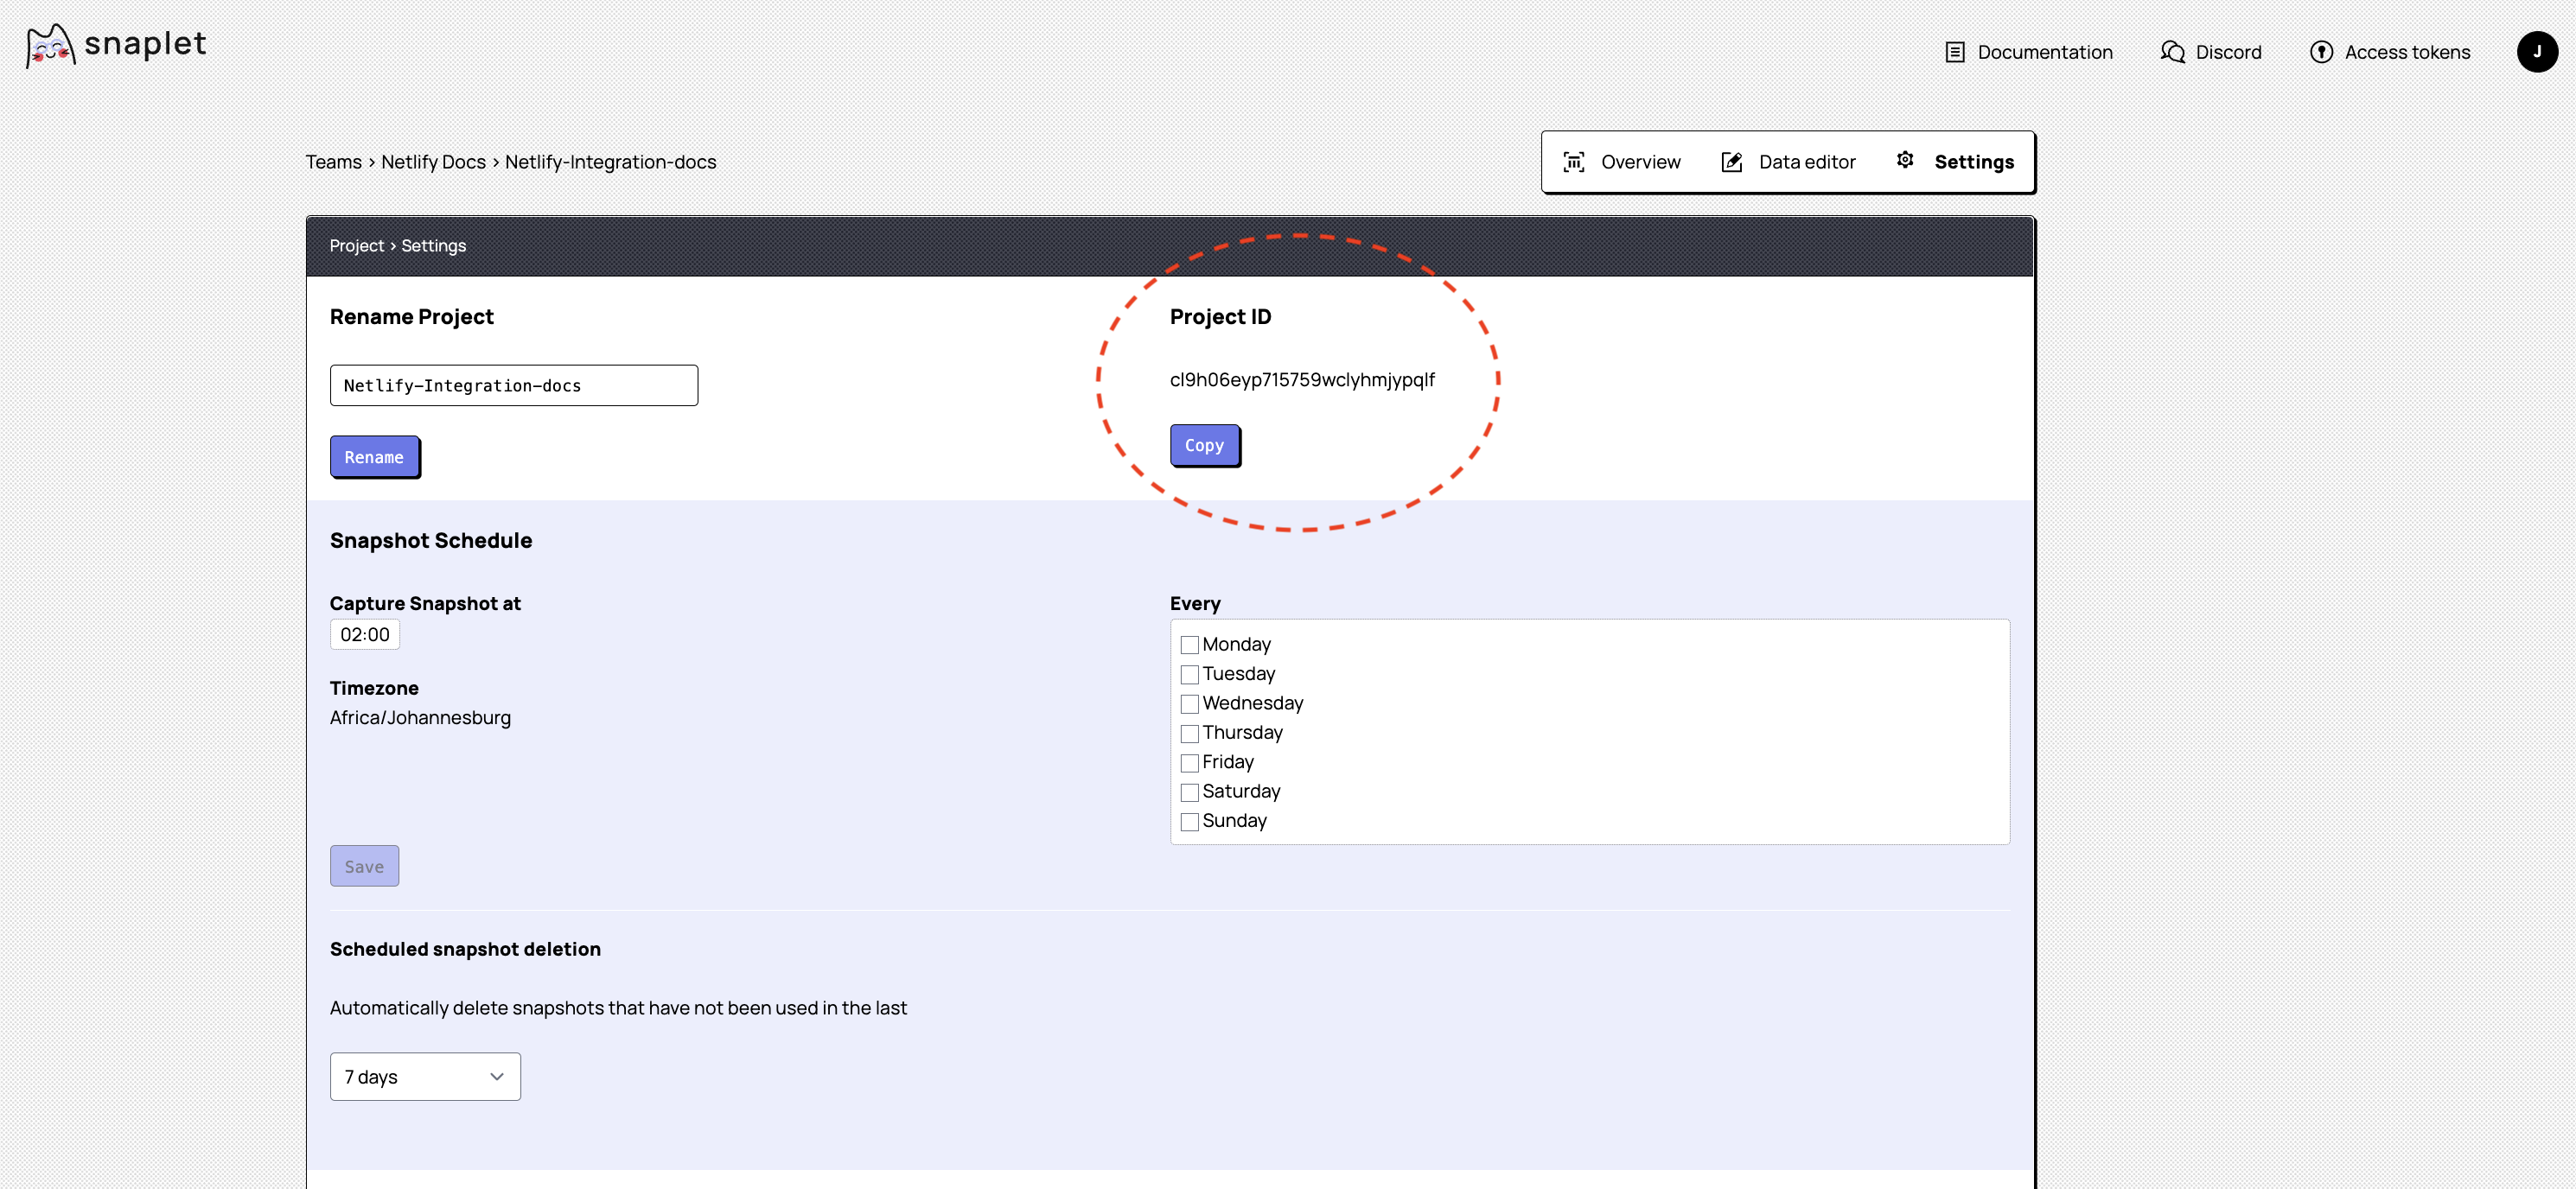
3.5. Add a Snaplet project id (SNAPLET_PROJECT_ID):
You'll also need to add a Snaplet project id to Netlify, which associates the preview database to the correct Snaplet project. The id is found in the Snaplet UI under Teams' > Your team > Your project > Settings. Click to copy your project id and use it in creating a new environment variable for your Netlify project called SNAPLET_PROJECT_ID.
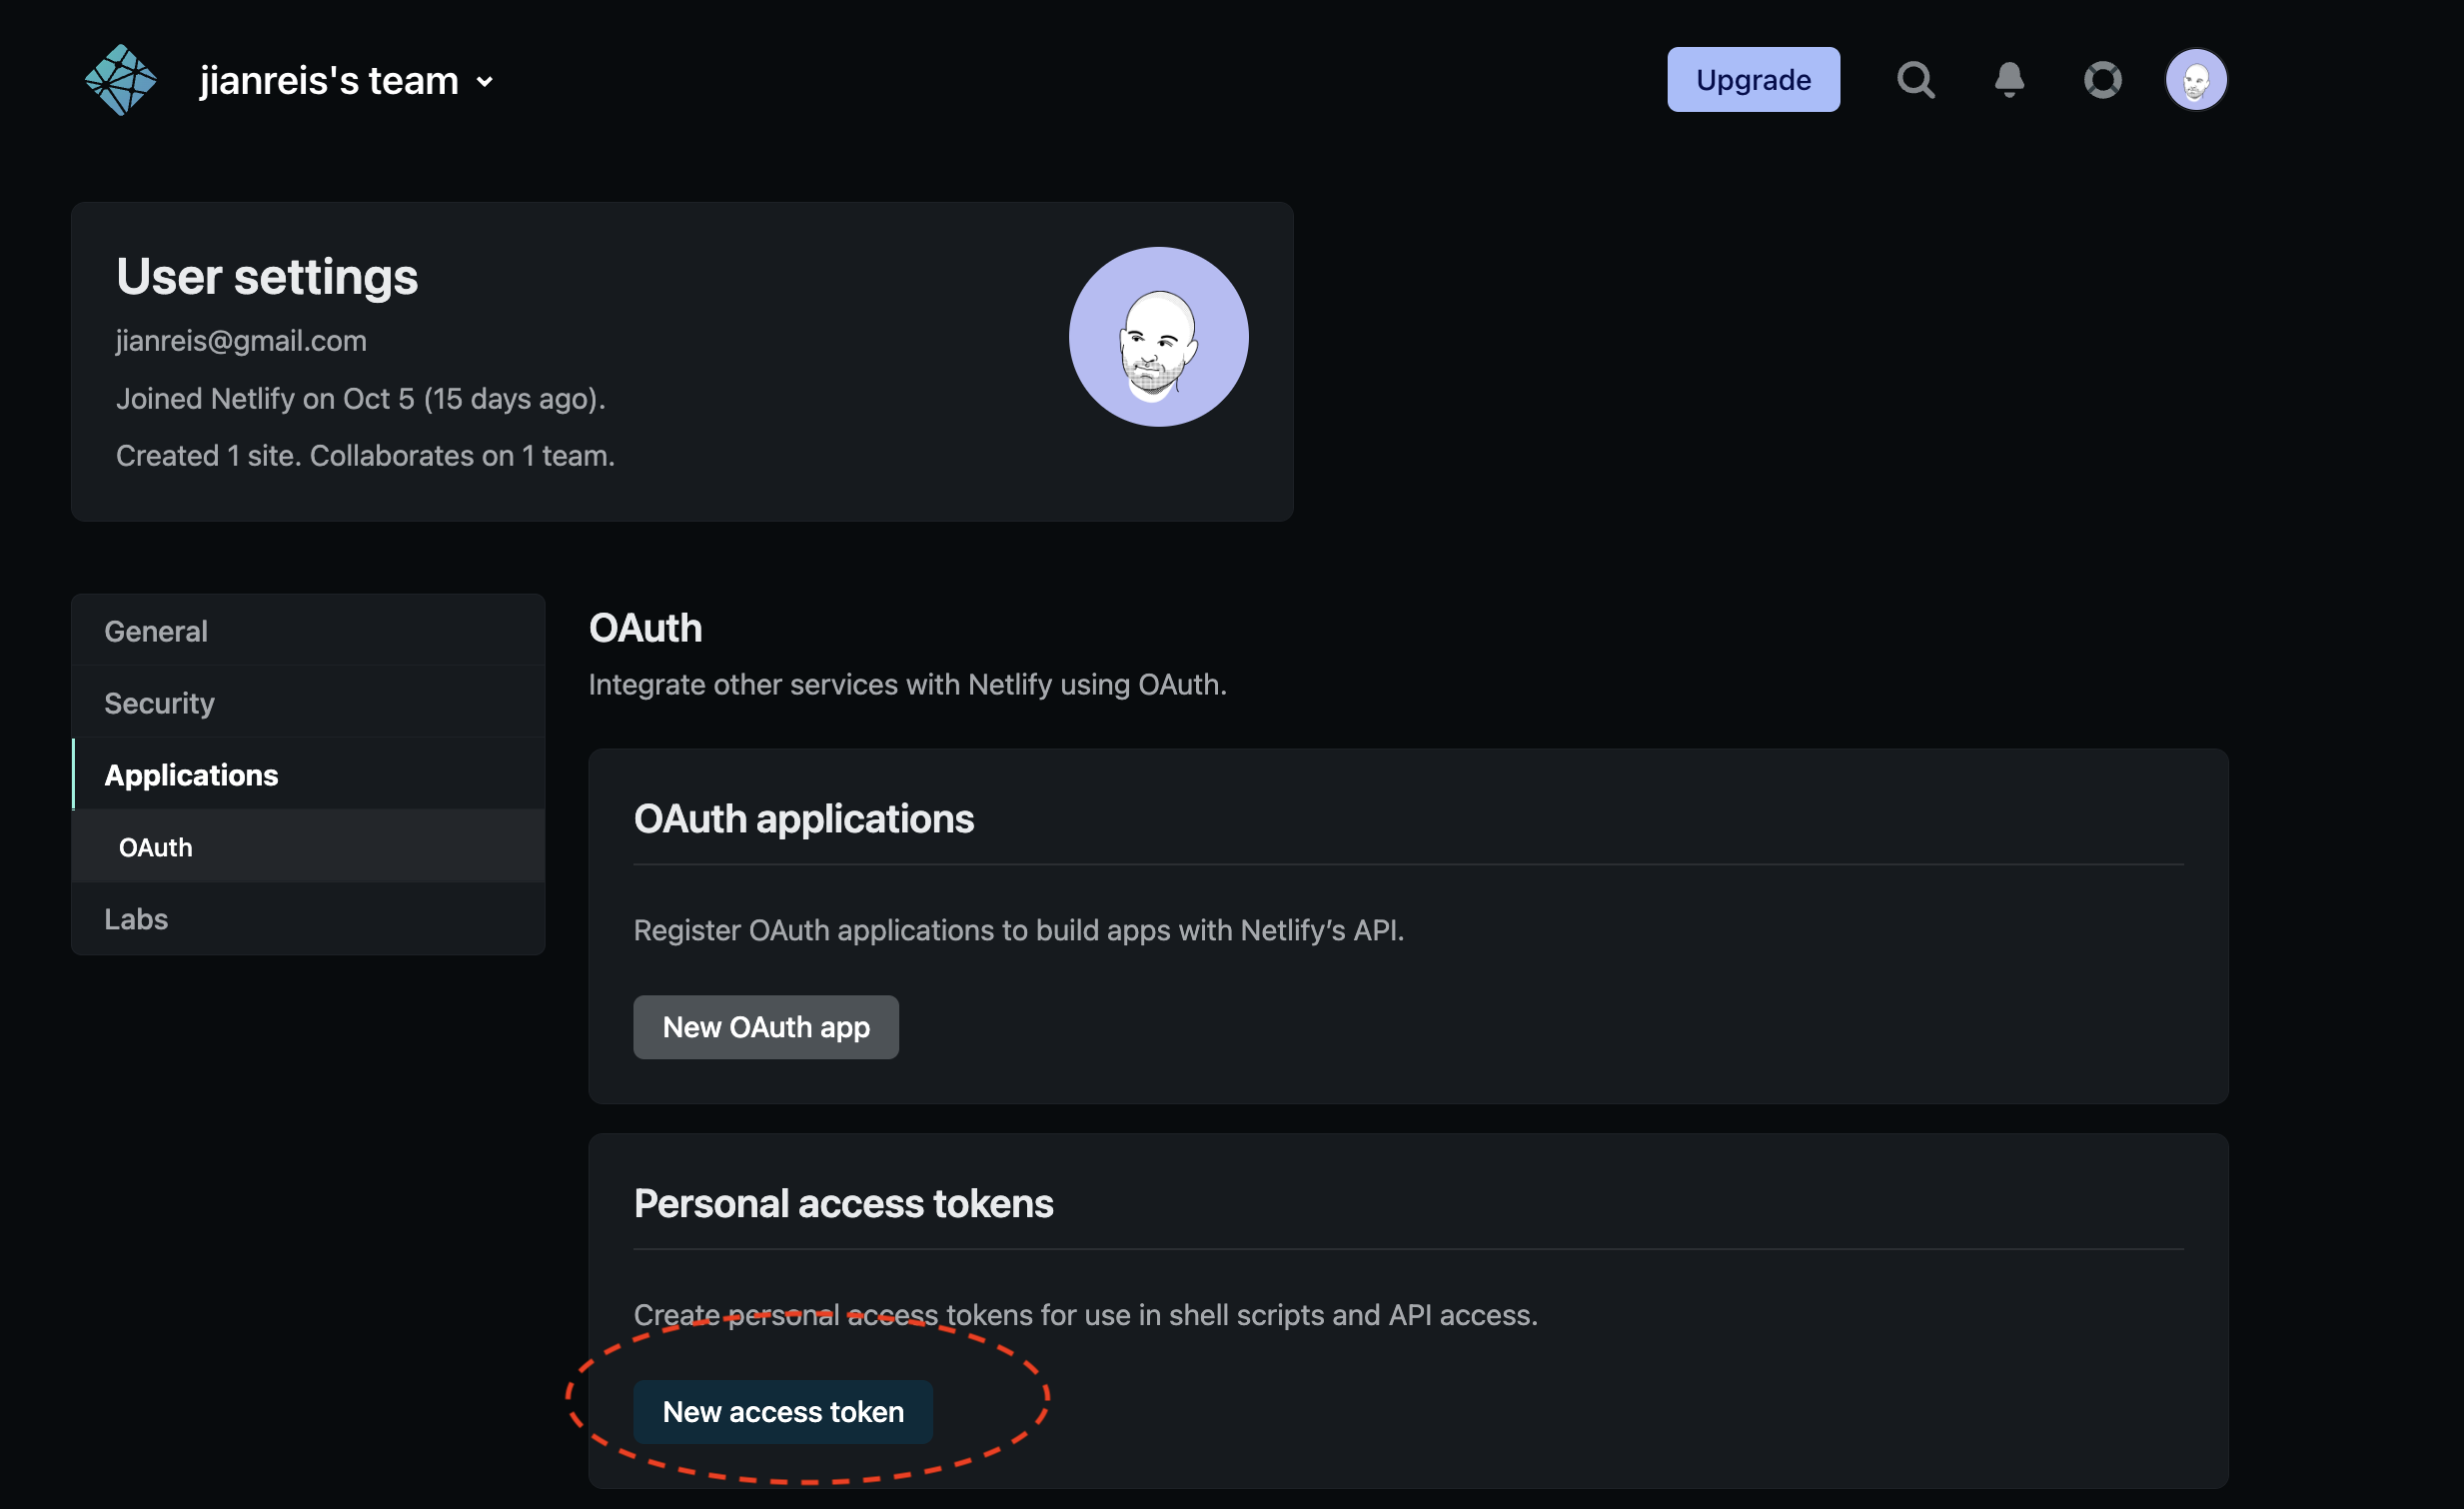
3.6. Add your Netlify access token (NETLIFY_ACCESS_TOKEN):
You'll also need to add an environment variable for your Netlify Access Token. This value can be found in the Netlify UI: click on your avatar in the top right menu, then navigate to User settings > Applications > OAuth > Personal access tokens. Generate an access token and copy this value, and create a new environment variable for your Netlify project called NETLIFY ACCESS TOKEN.
3.7. Add your GitHub access token (GITHUB_ACCESS_TOKEN):
One final environment variable - your GitHub access token! We'll need to create one in GitHub, by clicking on your avatar in the top right, and then navigating to Settings > Developer Settings > Personal access tokens > Tokens (classic) and clicking Generate new token (use a classic token if promted). Make sure to scope it repo and click the Generate token button.
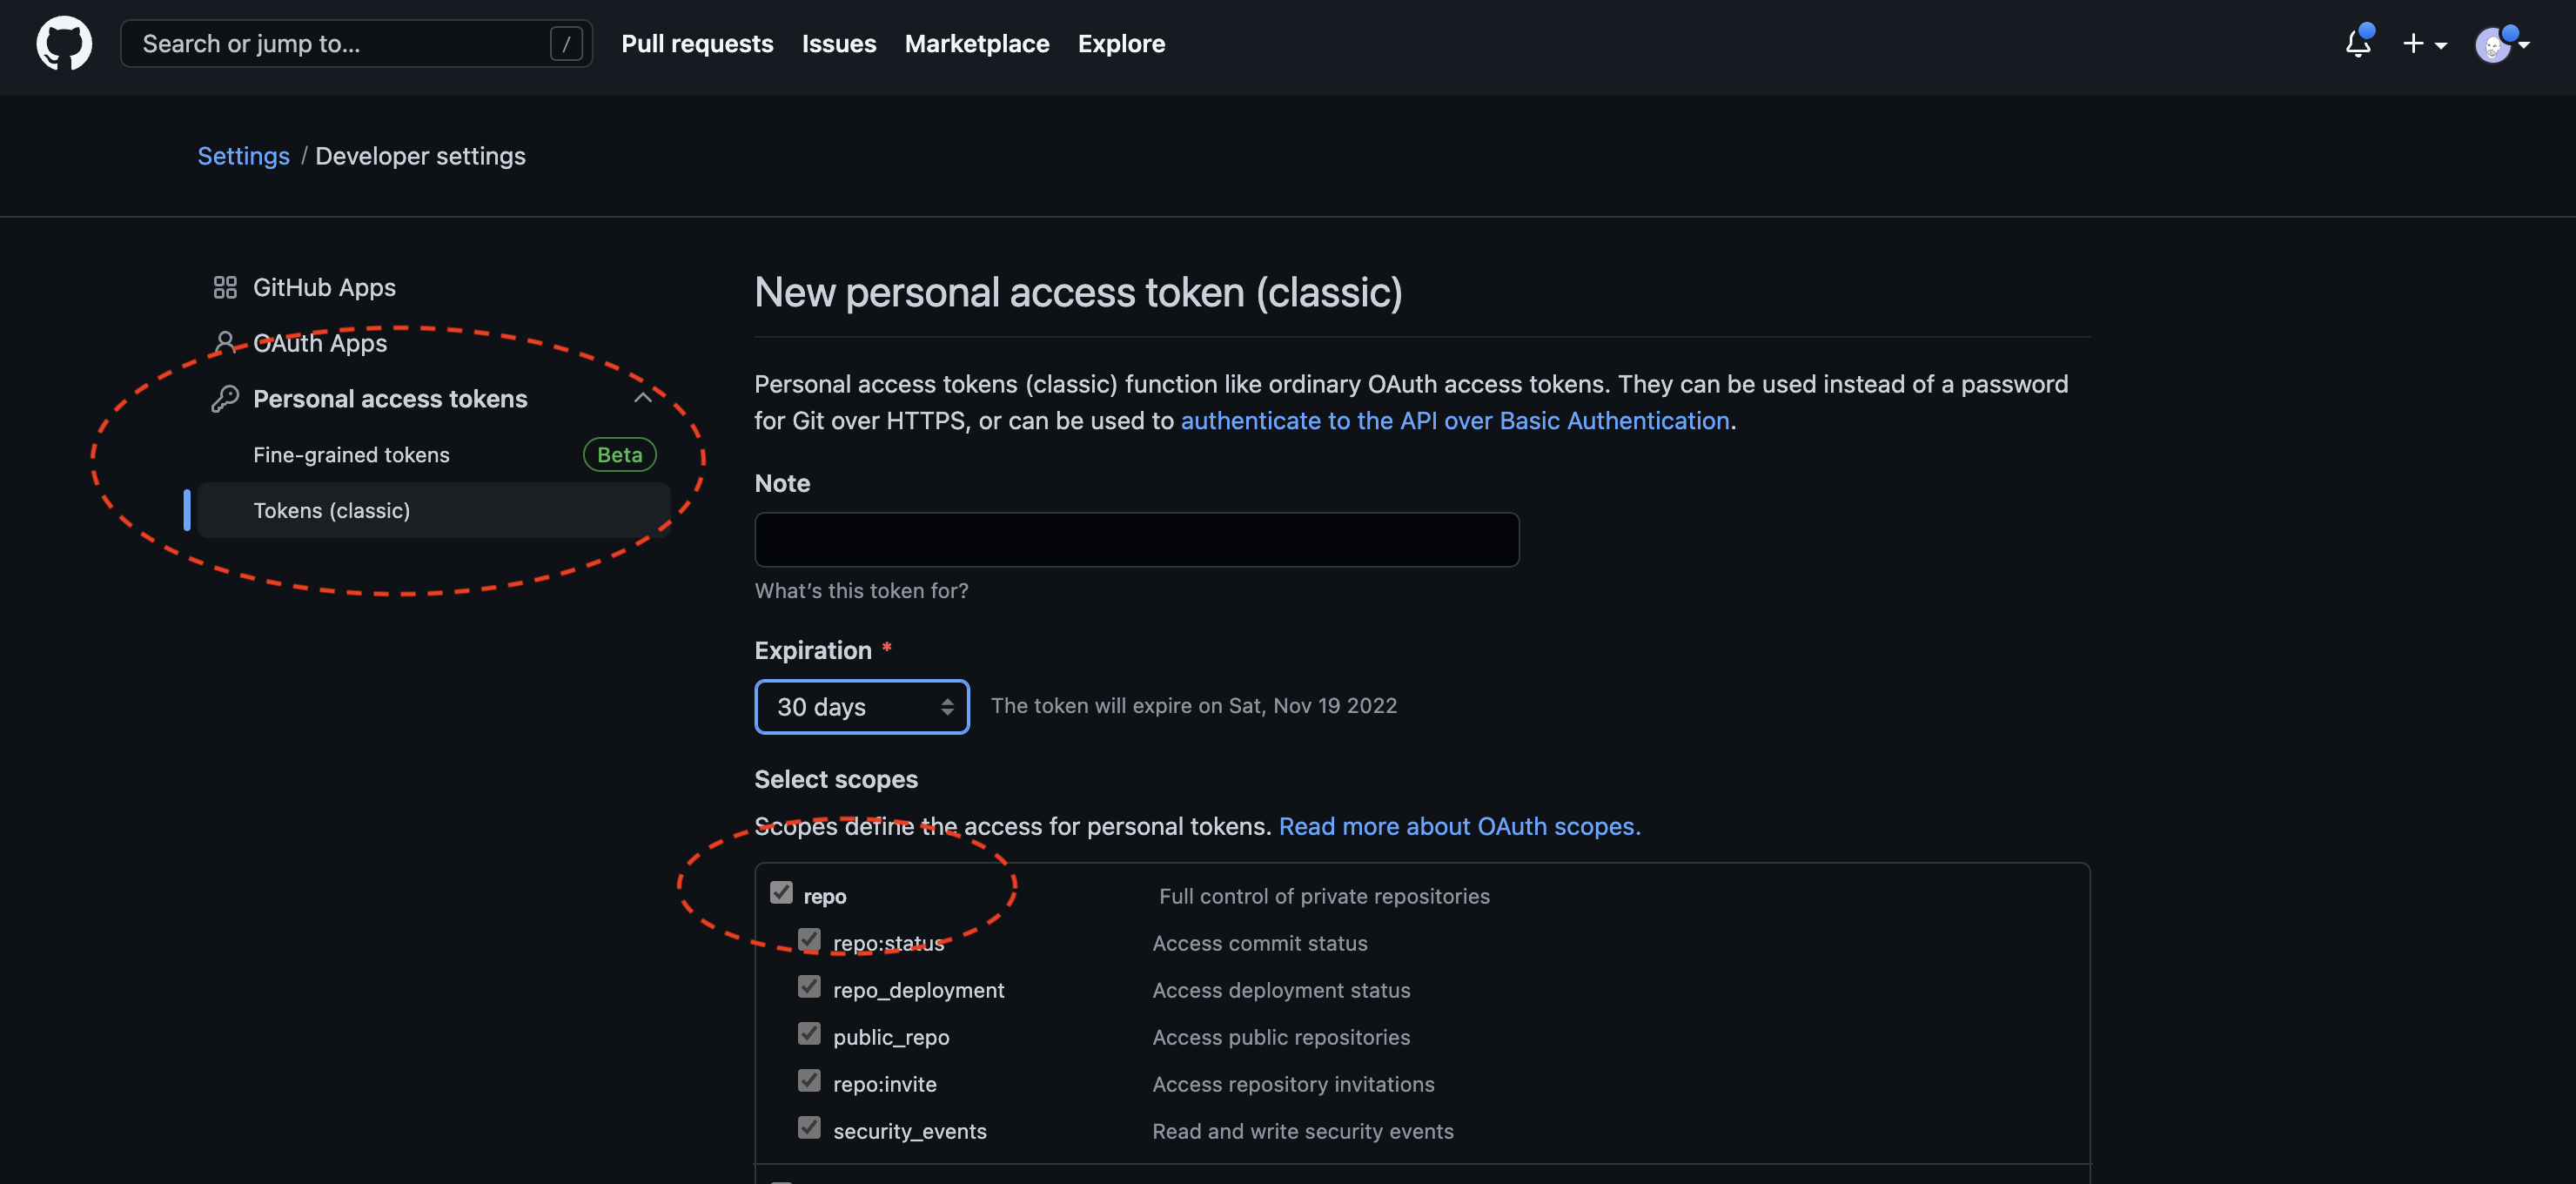
We use this token to fetch information about the pull request associated with the branch the plugin is running in, which allows the plugin to clean up databases after PRs are merged. As with all the other tokens, create an environment variable called GITHUB_ACCESS_TOKEN in your Netlify project.
That's it! All done and configured. You should have five environment variables in total, and you're now able to test your integration.
Step 4: Trigger a preview build.
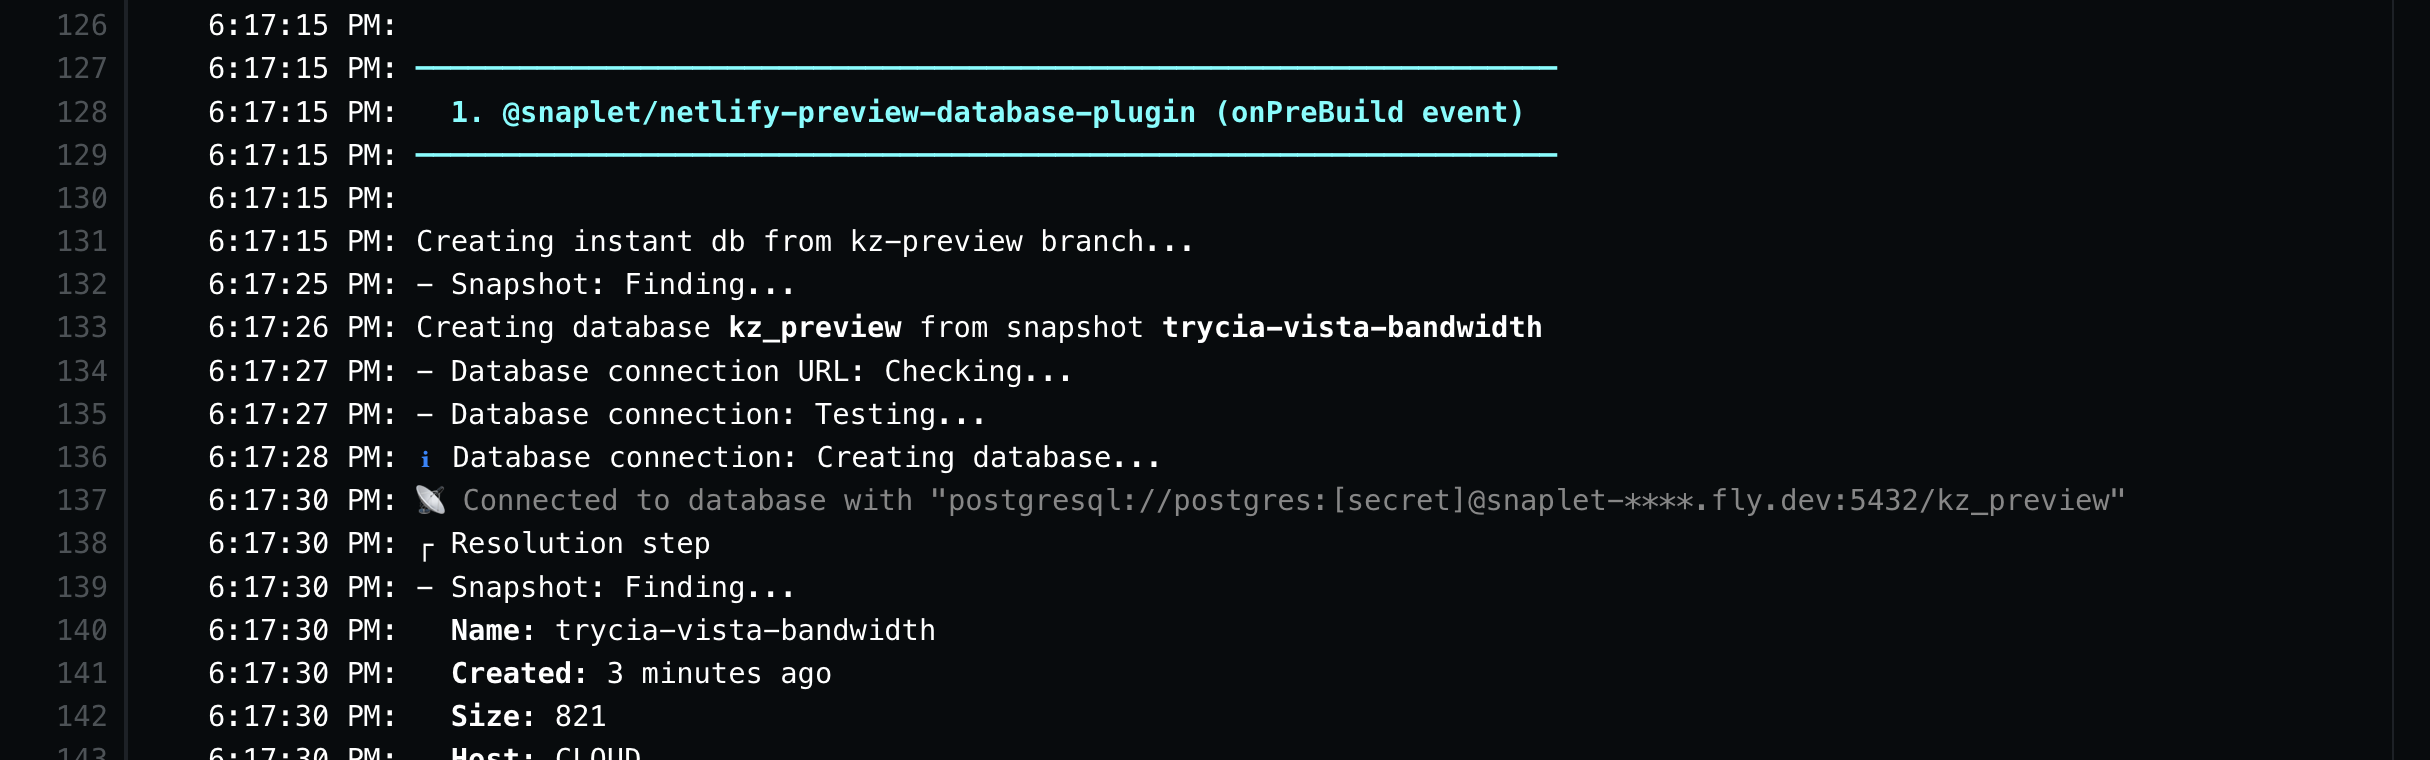
With all steps completed, once a PR is created from your git client, a new build will be triggered in Netlify and the plugin will run before the build process. The sequence of events that happens is as follows:
- Your latest Snaplet snapshot is used to populate a temporary database with data.
- That unique, isolated preview database is associated with your preview deployment.
- Once your preview deployment is closed, the database is destroyed.
After your build is done, a preview button will appear which allow you to preview the changes made in that PR.
Well done! You've successfully captured a snapshot of your database (anonymizing sensitive personally-identifiable information), and restored that snapshot's data into your Netlify Preview Environment's database. You now have an isolated deployment environment with a unique, isolated database for each preview deployment!
We hope this guide helped! If you get stuck or need assistance, come ask us on Discord (opens in a new tab).